Home Cured Olives – Sonoma County Style…
Well… let’s just say it’s been a long time, but I have been keeping busy.
October is when the olive harvest begins in Suryalila and it is one of my favorite times of year to be there. And so when this October rolled around and I was far away from Spain, I thought I’d better see what California has to offer…
As some of you know, I have been making a slow transition this year from New York City back to Northern California, which is where I grew up. I really never intended to move back, but my father is losing his eyesight to macular degeneration, so I have been bouncing back and forth all year between my dad and his lovely 3 acre property in Northern Sonoma County, and my boyfriend Hannes in our home in Harlem, NY. To say this is a culture shock would not do it justice, but actually, I am getting used to it and am now enjoying the radical change of pace, in both directions.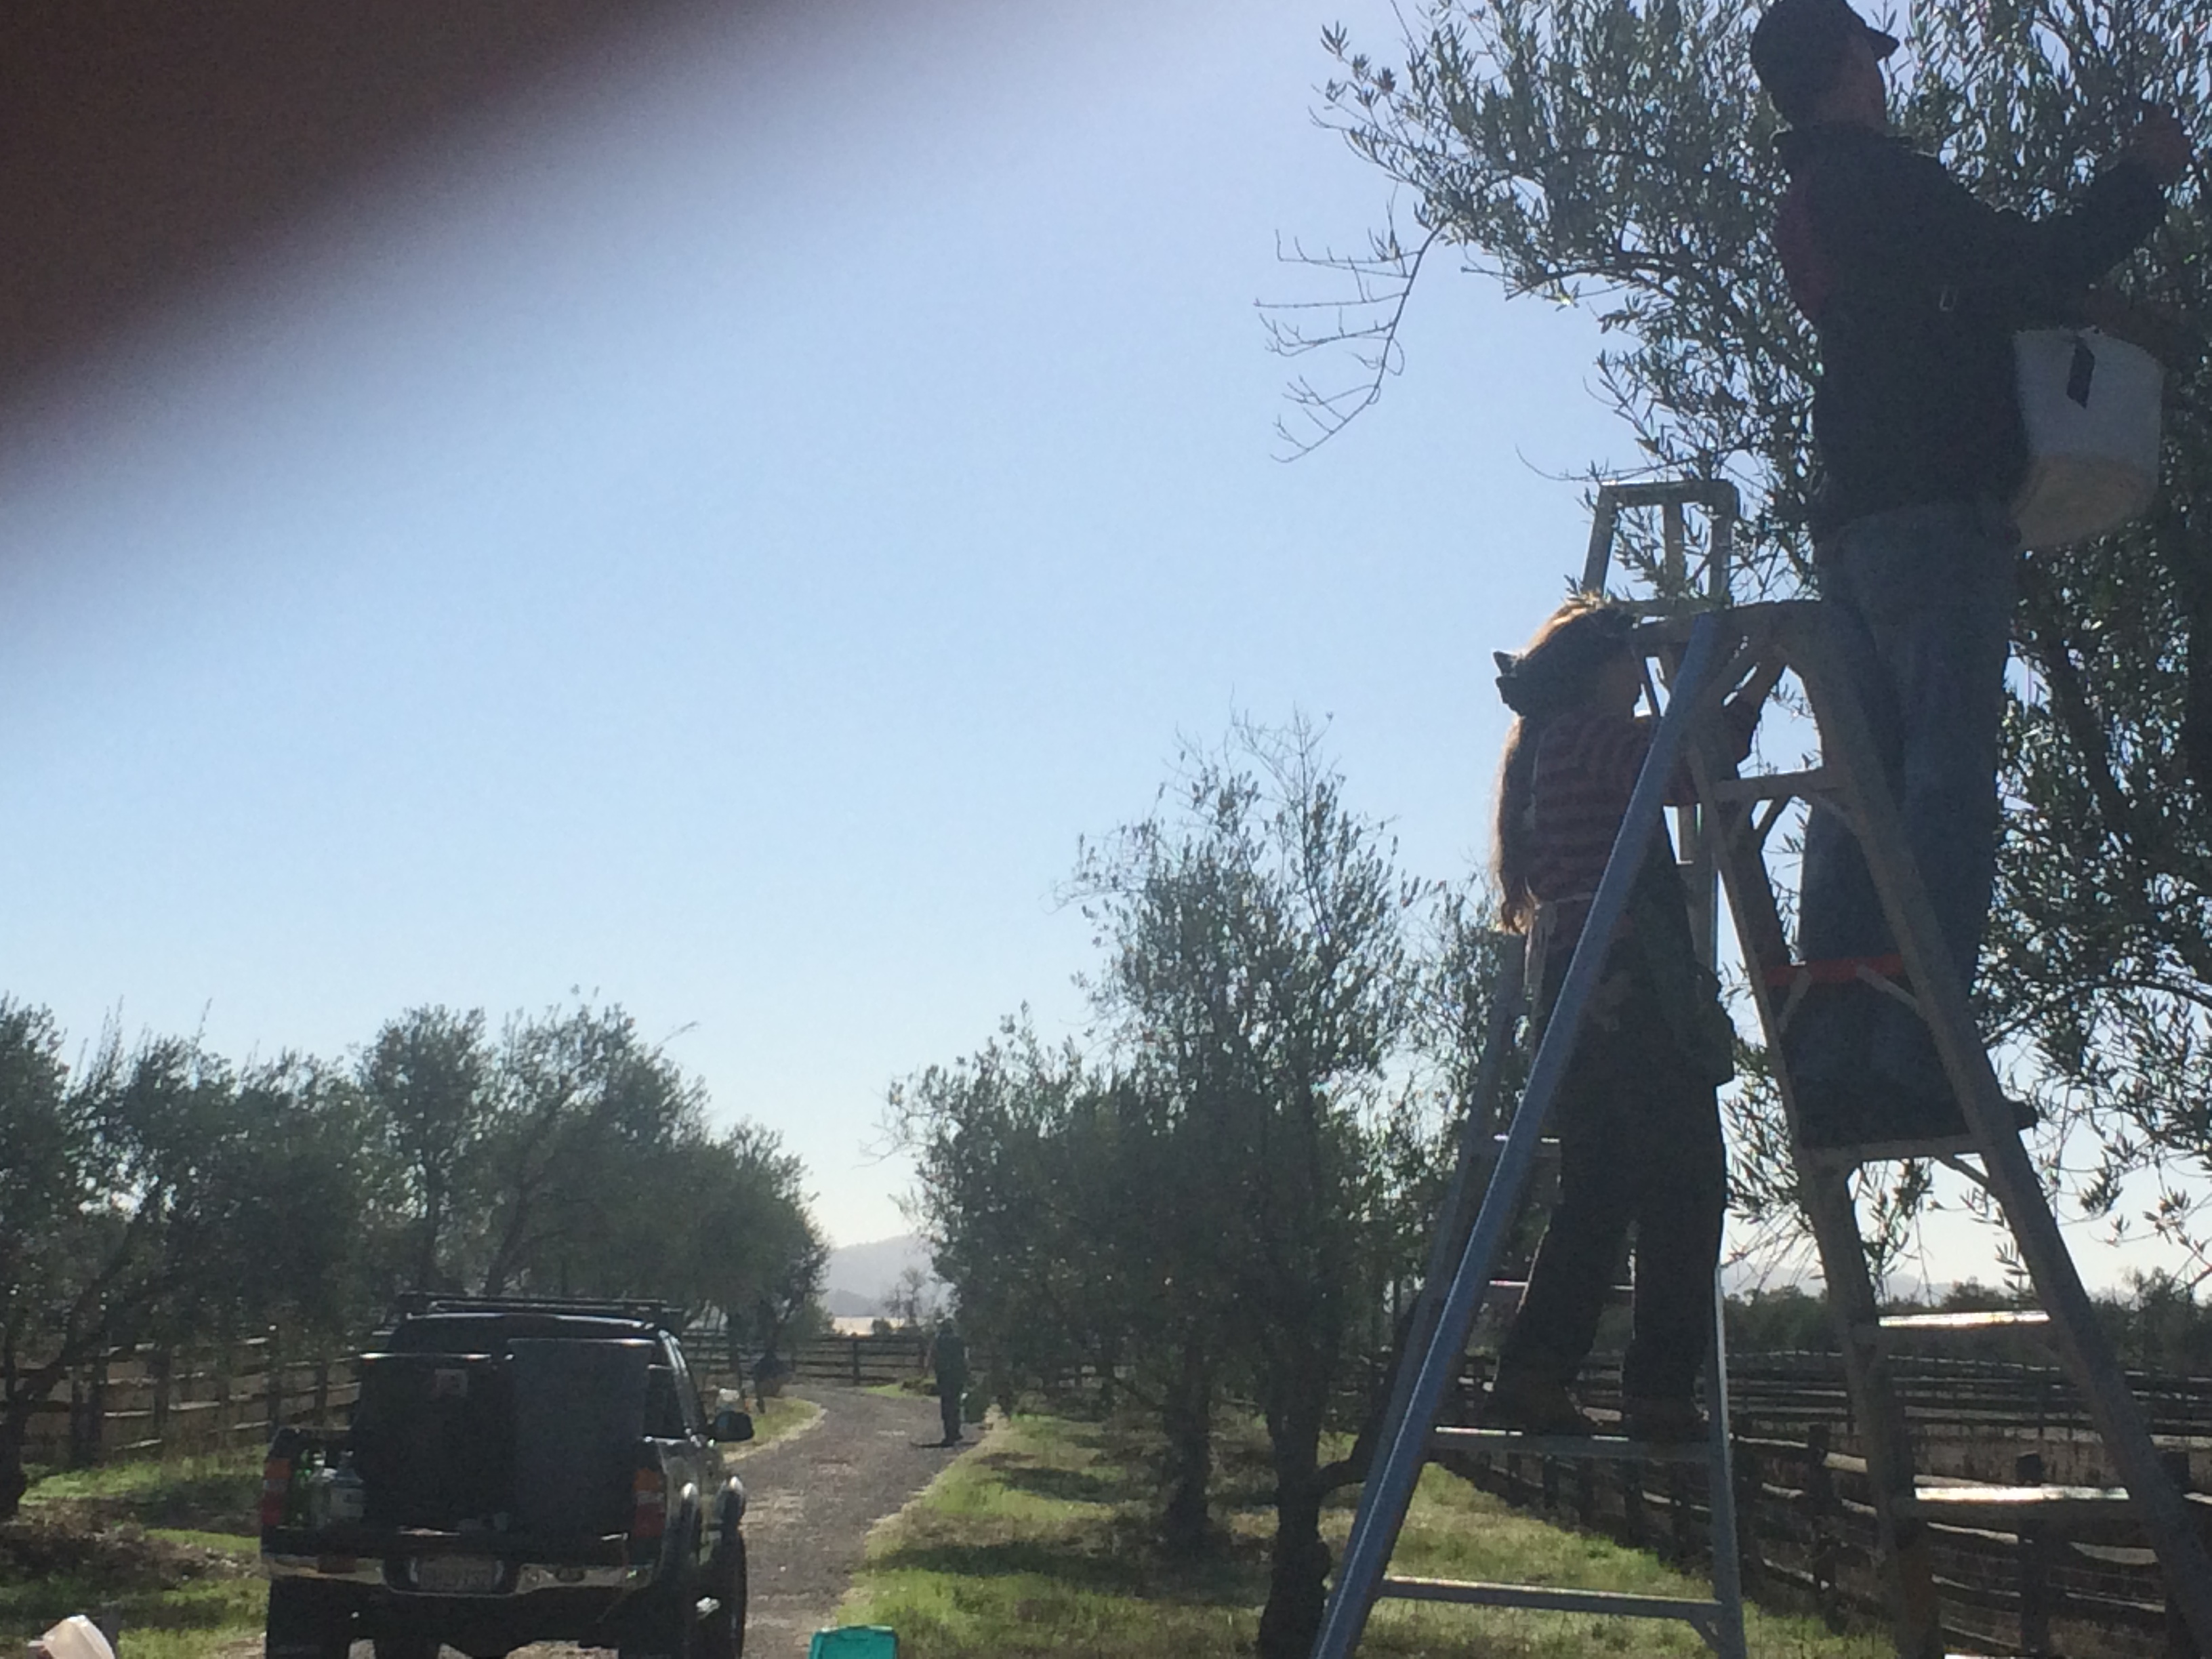
Needless to say, Sonoma County is an exceptionally beautiful place to live, and I am beginning to develop a real appreciation for the year-round farmer’s markets and the endless opportunities to grow, forage, brew, and preserve the bounties of the county. My father’s property is flanked by wineries on both sides; the road we live on was once called Oat Valley Road, and the next town West of us is called Hopland, so clearly, brewing and fermenting are in the air here. When you drive through Hopland, you see hops growing along side the road, and driving along Highway 101 in the Fall, the air is thick with the smell of must from fermenting grapes… it’s intoxicating!


And… what is lining all these the vineyards? Olive trees!
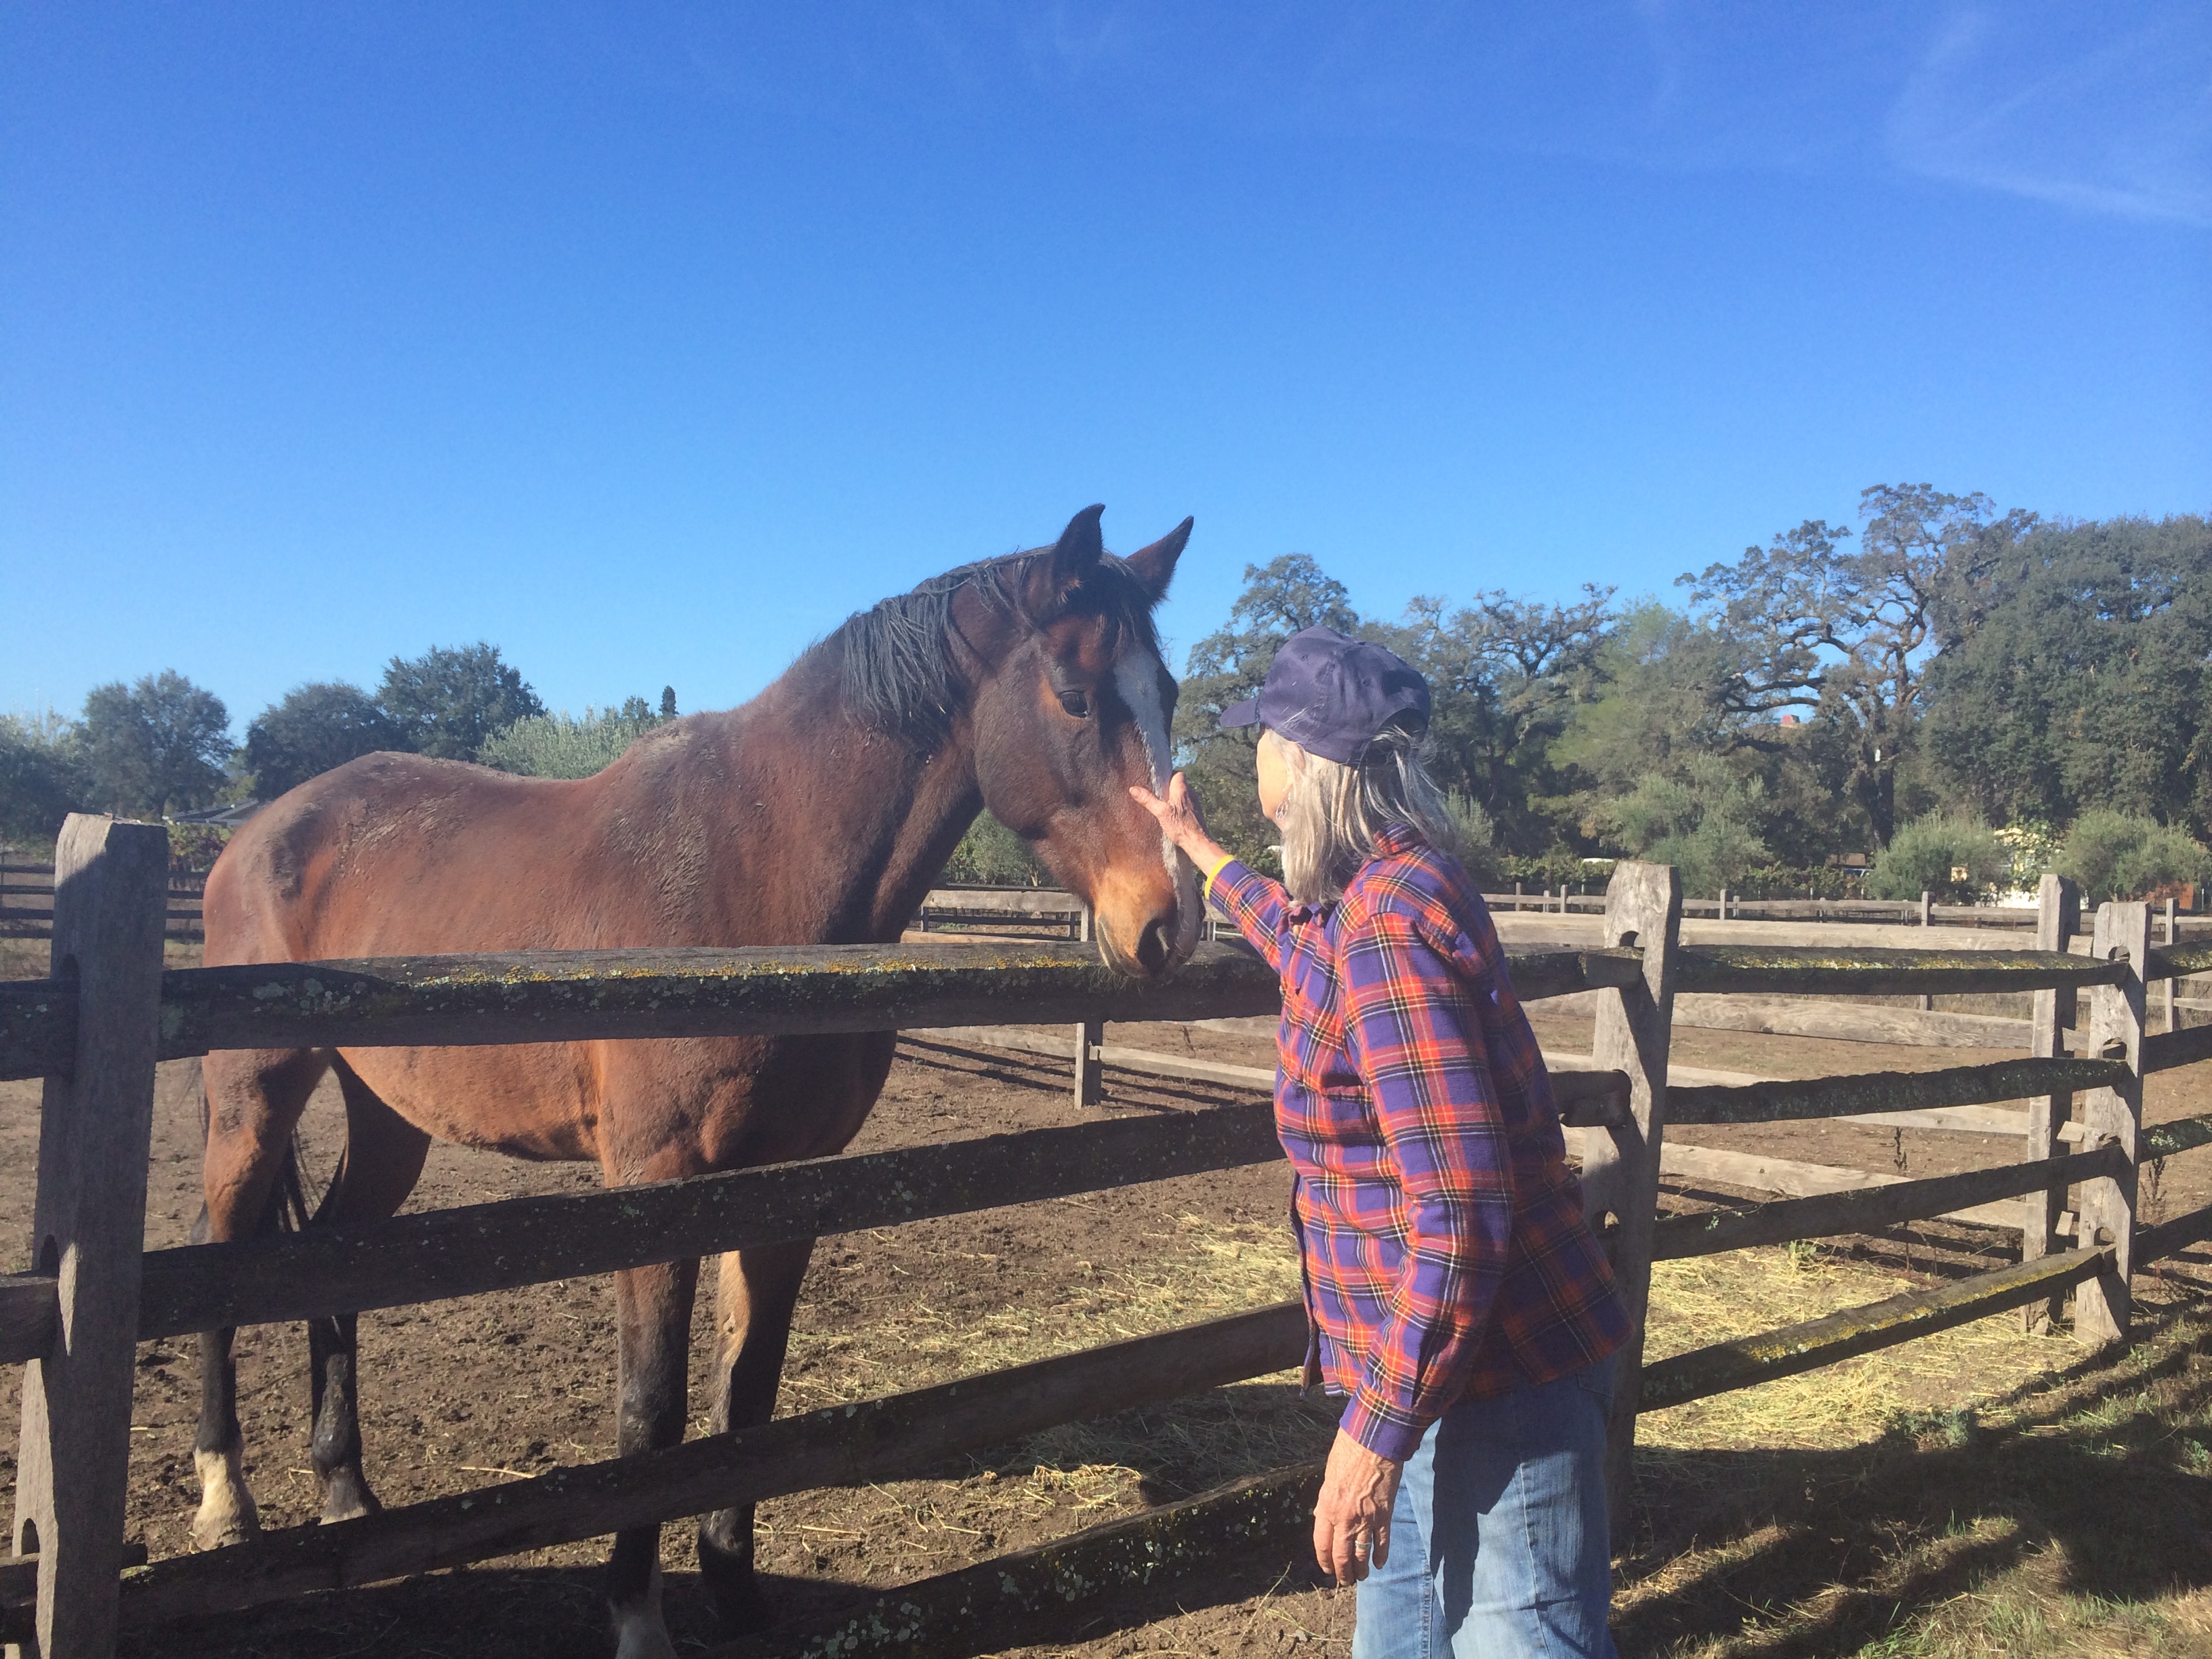
So about a month ago, I got myself invited to an olive picking party at a neighbor’s magnificent horse ranch, and our small crew of 14 spent most of a day picking 750 pounds of manzanilla olives for cold pressed olive oil. It was seriously fun, hard work. And guess how much olive oil that amount of olives will yield? …. only 13 gallons! I will never grumble about the price of good olive oil again.
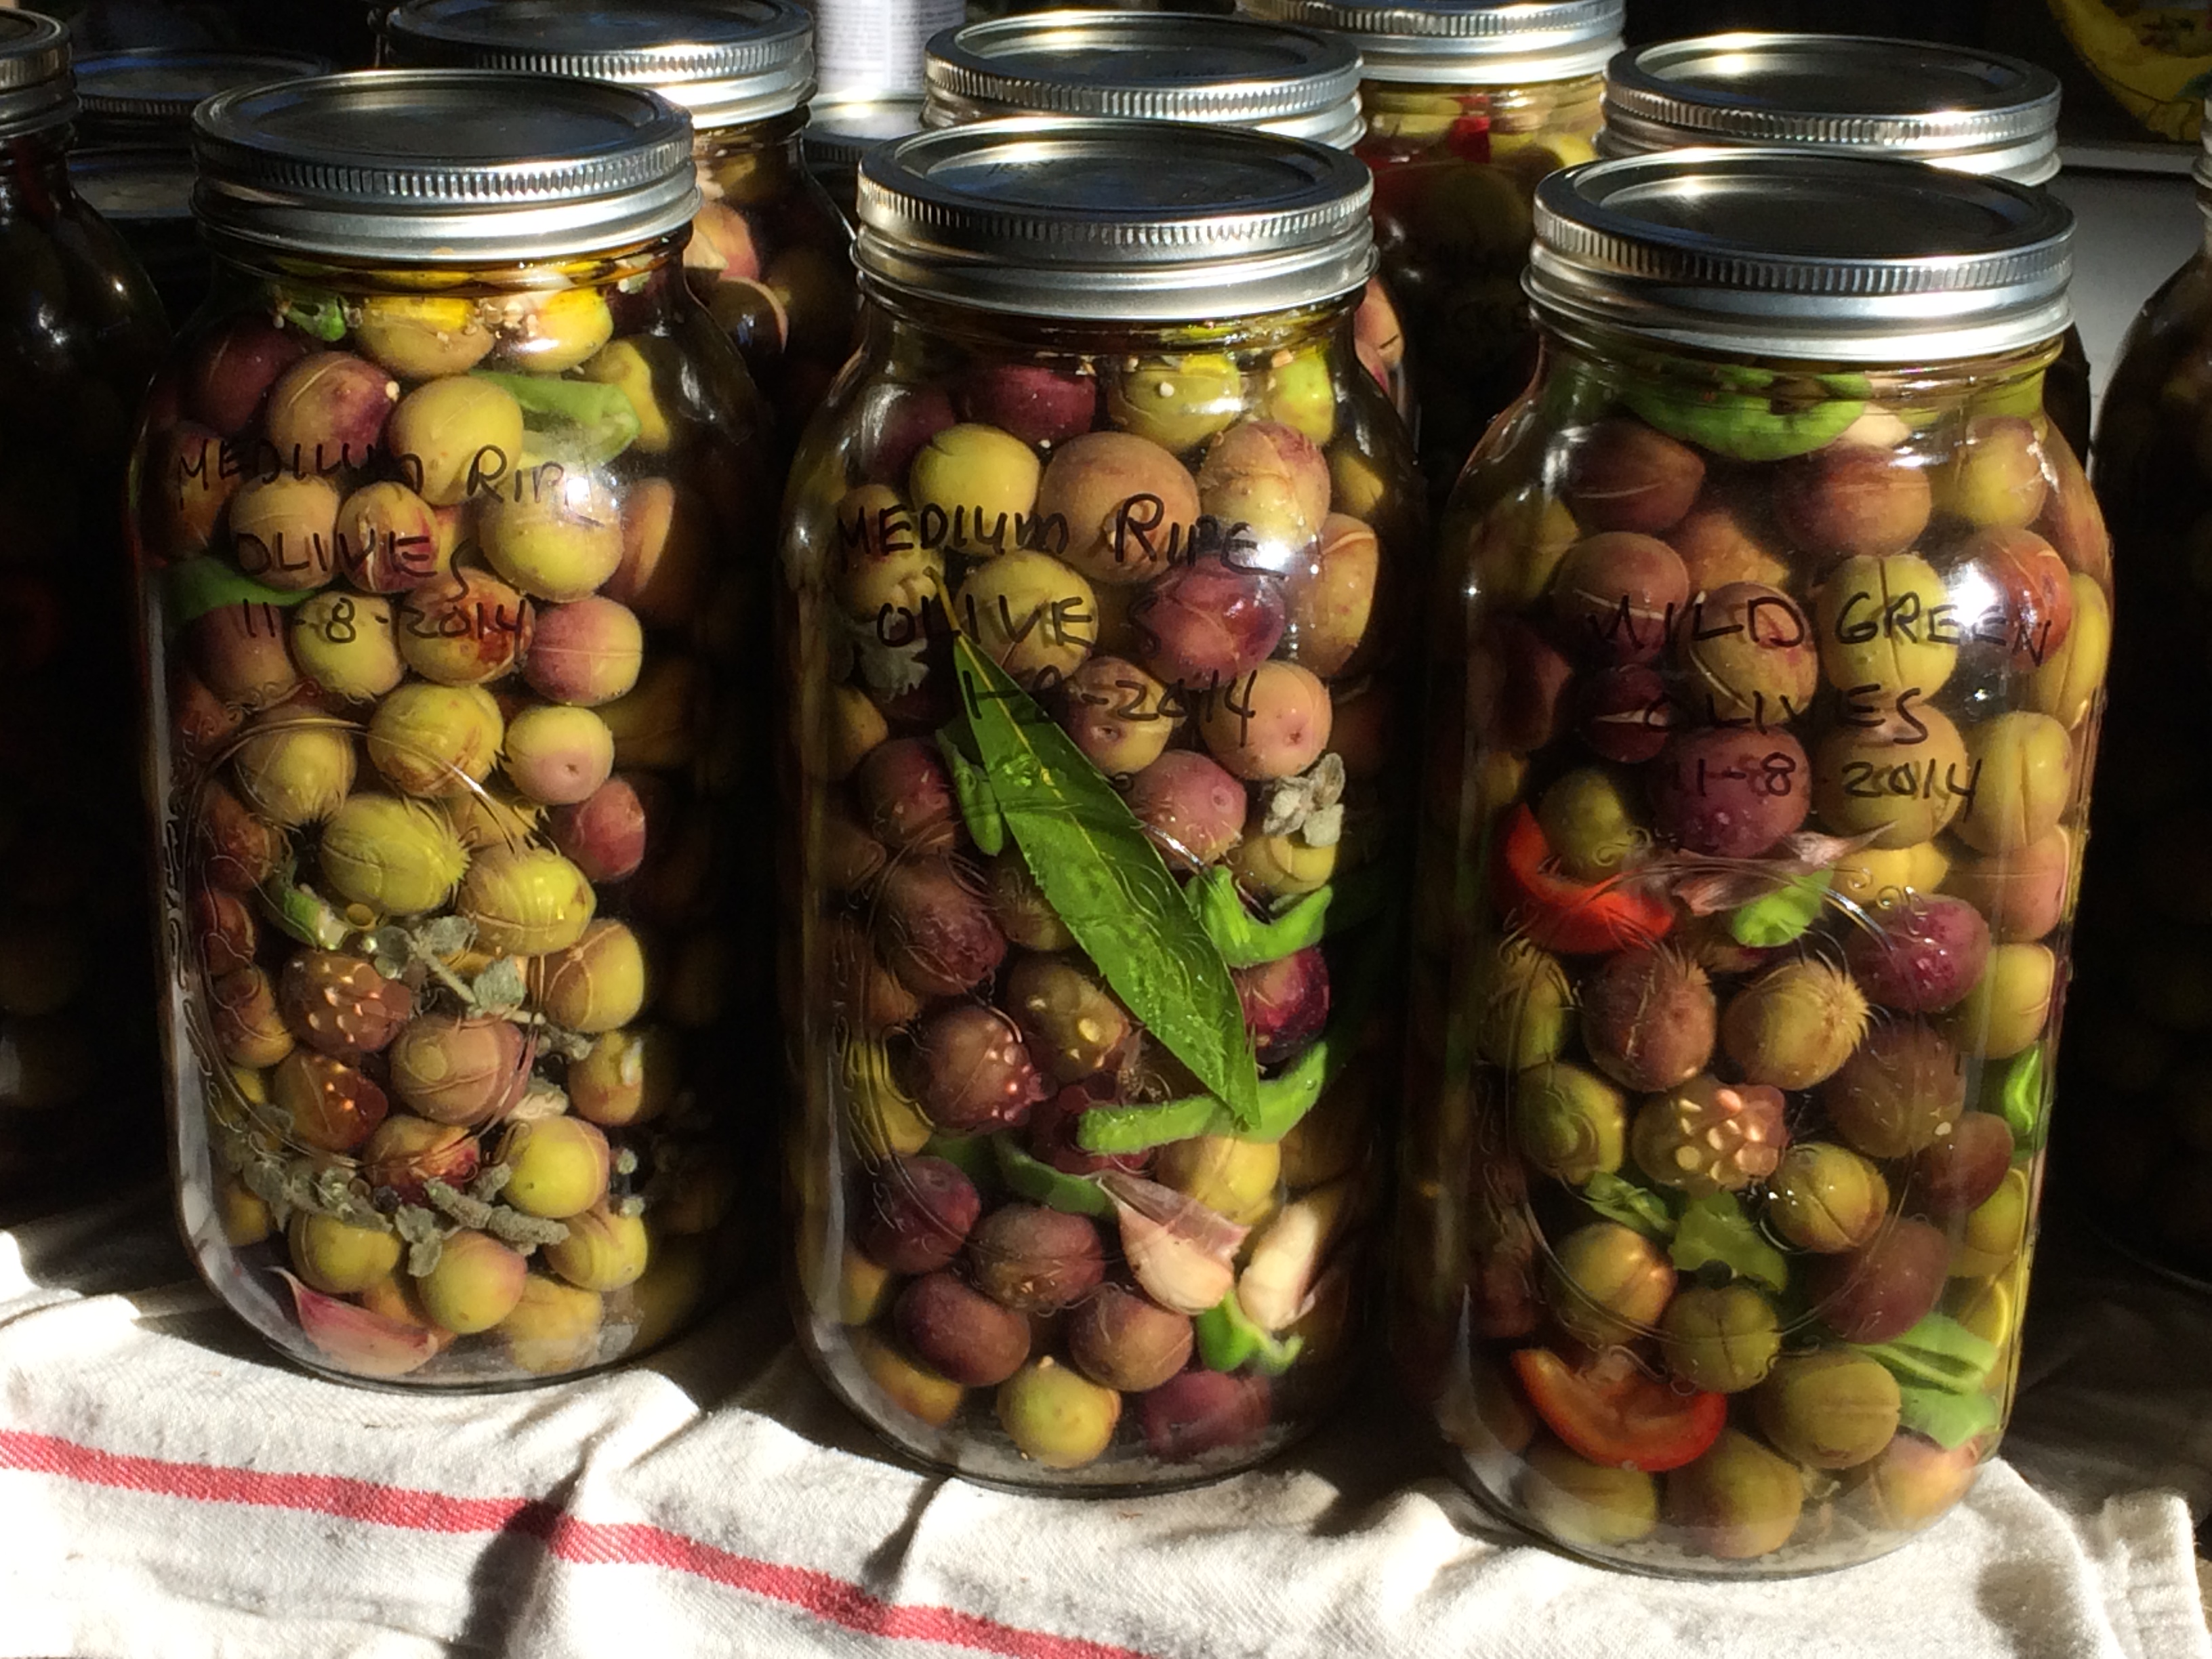
Later that week I went back and hand-picked another 7 gallons of the green and medium ripe olives from the remaining trees. I looked for the greener olives for eating. I couldn’t wait to cure them!
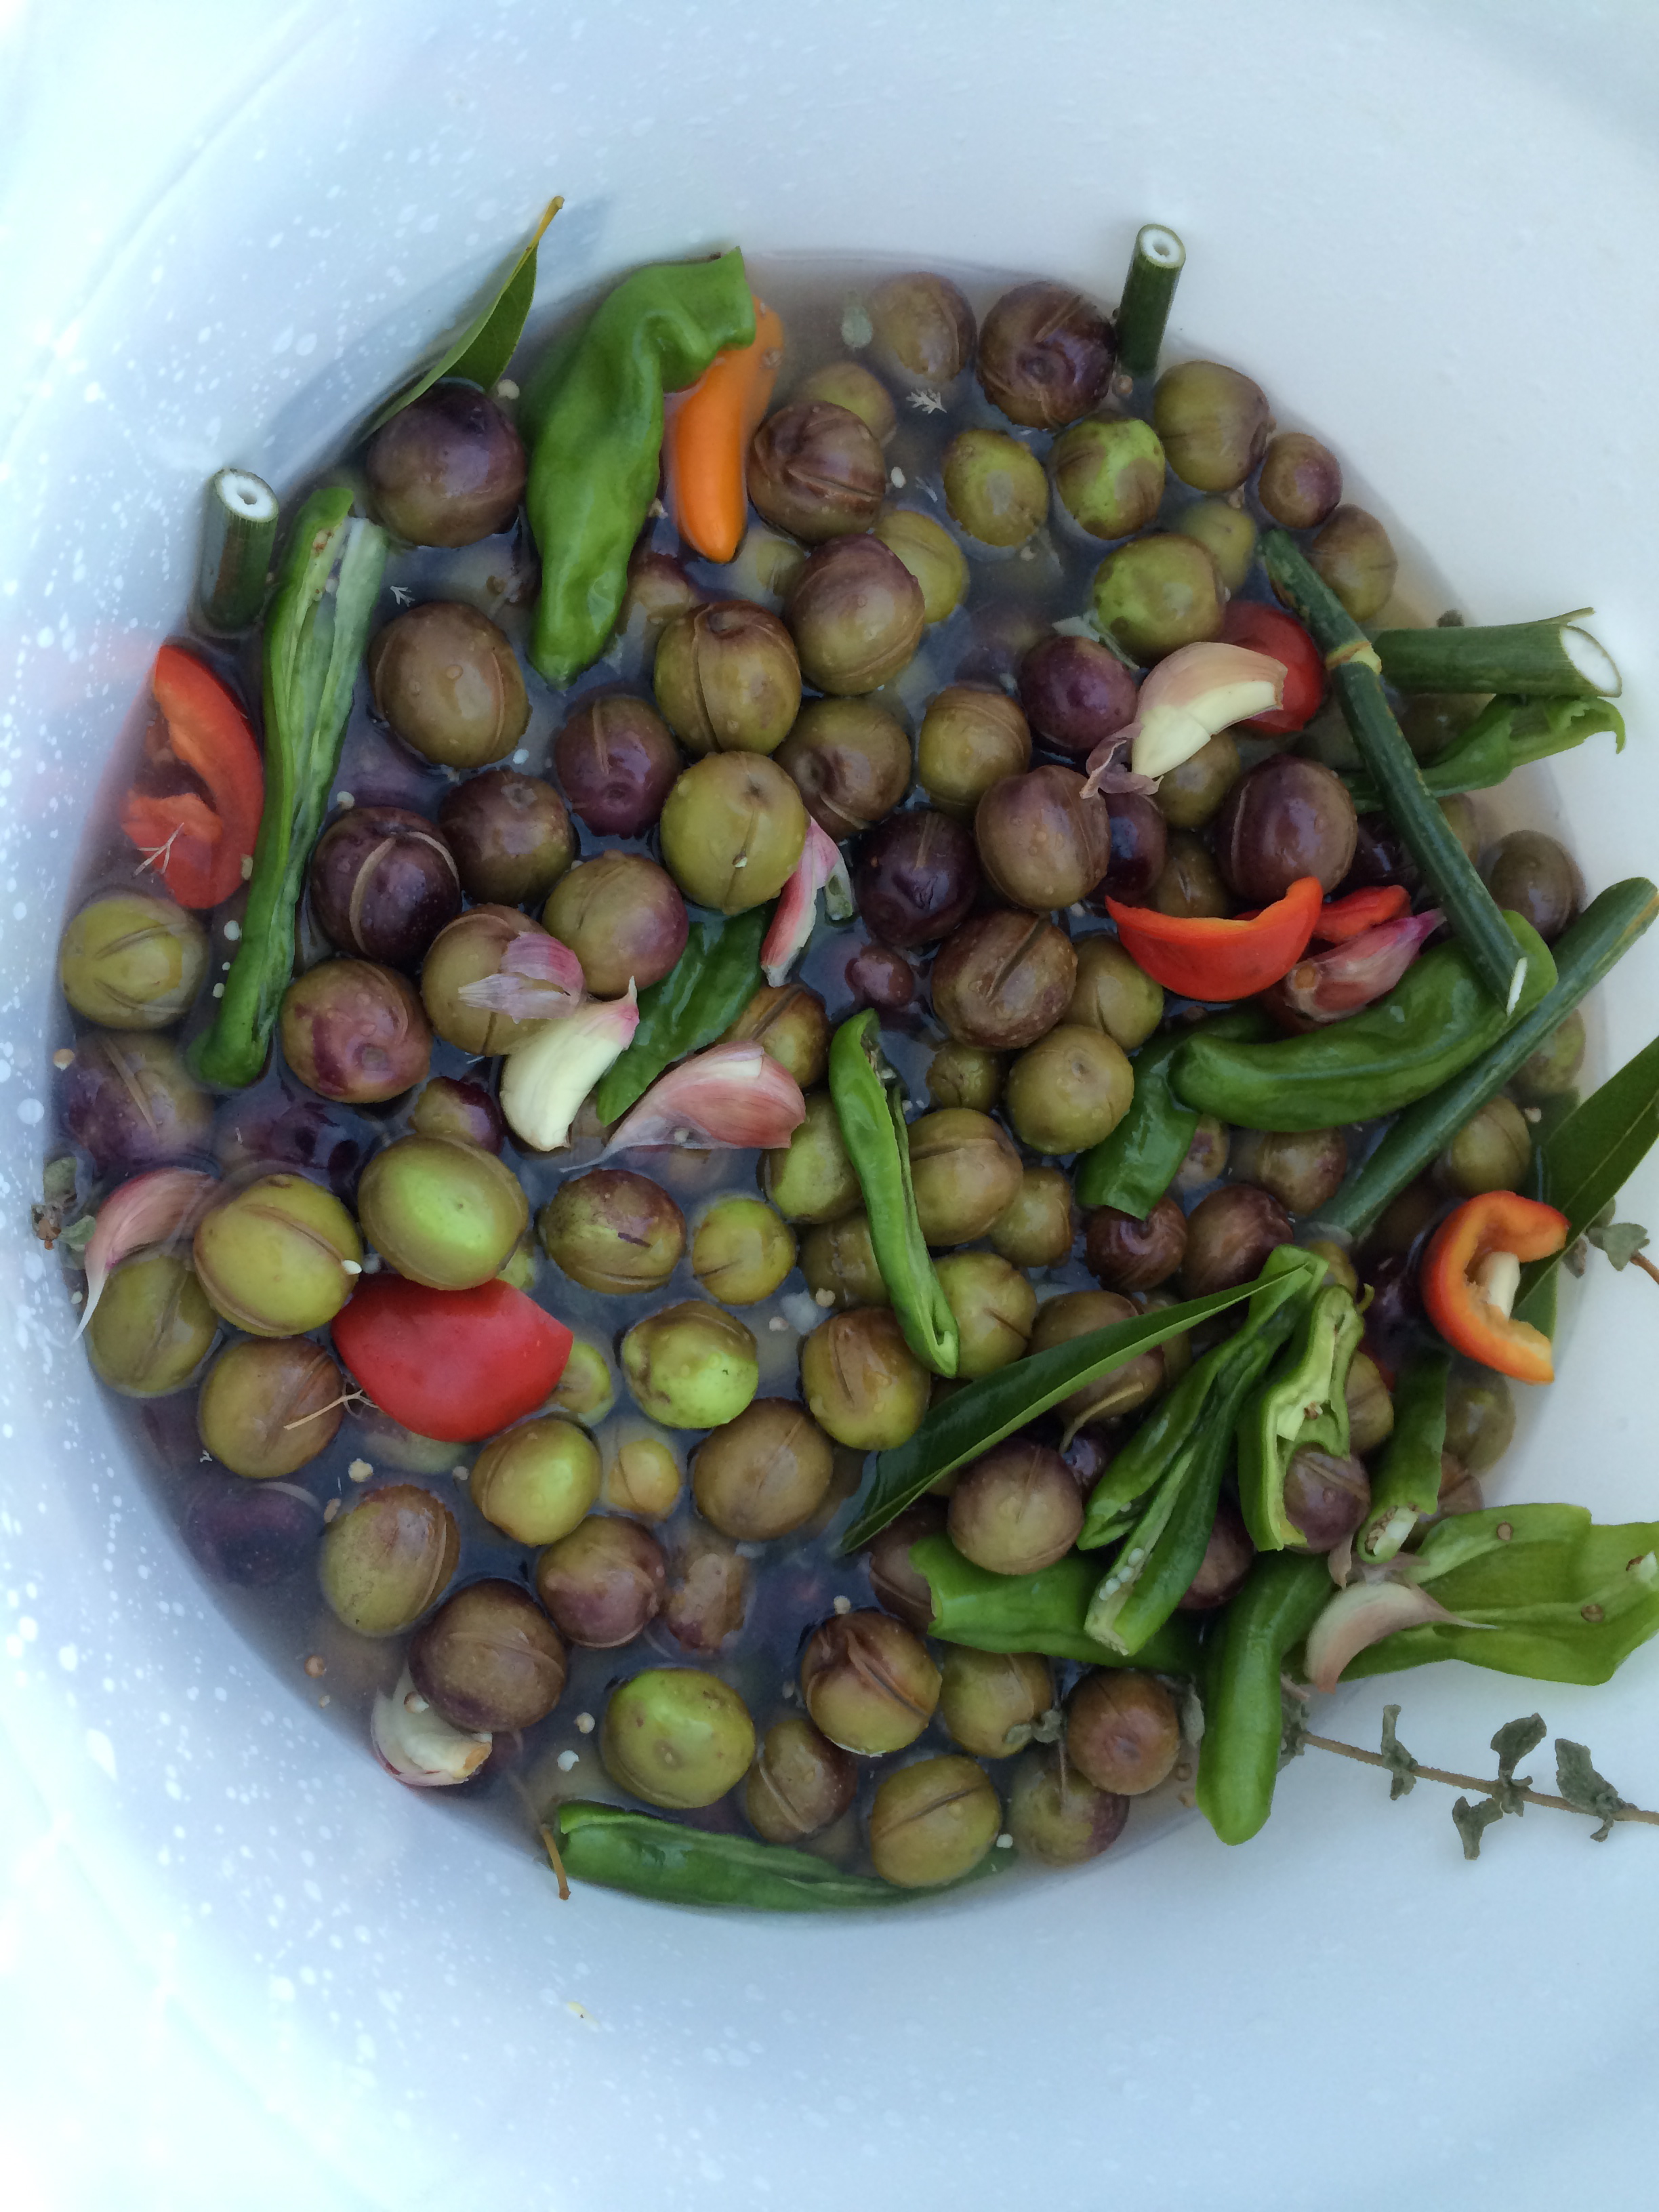
The olive curing process that I know is a water-cured process which I learned in Suryalila a few years ago from our neighbor there, Jose. What the Andalusians do is to crack or score each olive by hand, then soak for 7 to 10 days in water to remove the bitterness, and finally brine them in salt water infused with garlic, peppers and the herbs which grow wild in the area. I thought I would do the same, using locally grown and harvested Sonoma County ingredients, which included wild fennel foraged from the side of the road, California bay laurel leaves, marjoram and wild cilantro from my dad’s yard, and bright peppers and fresh garlic from the Cloverdale Farmer’s Market. Bounty of the County indeed!
Home Cured Olives – 7.5 Gallon Yield
- 7 gallons fresh green and medium ripe olives
- 3 gallons water
- 2# celtic grey sea salt
- 1/4 c whole peppercorns, lightly cracked
- 3 cups unpeeled garlic cloves
- 2# fresh red and green peppers, sliced
- 3 T whole coriander seeds
- 10 -15 fresh marjoram sprigs
- 10 – 20 fresh bay leaves
- 16 stalks fresh fennel, in 4-5″ pieces
- 36 oz white wine vinegar
- 750 ml olive oil (to pour over tops of olives)
Sort the Olives:

Sort olives, seperating the very greenest ones to be cracked, the medium to be scored with a knive, and the very ripest ones to be kept whole and salt cured.
- Cracked Green: With a mallet, gently crack each green olive on one side, just so it splits open. Try not to smash it too much here – you are are just looking to crack it open.
- Medium Ripe: With a sharp paring knive, score each medium-ripe olive in 3 or 4 places, so that the brine will penetrate down to the pit. Again, try to do without squashing or bruising the olives too much.
- Dark Black: The very dark, ripe olives I kept whole and covered in course salt and stored away in a cardboard box in a dark closet to “sun dry” them, ironically. This is a first time for me with this process so more later as I figure out what I am doing here…
Soak the Olives:
Using at least three 5 gallon buckets, cover the olives completely in cold filtered water and float a plate with a small weight on top to keep the top layer of olives submerged. Let soak in a cool dark place for a week to 10 days, draining and changing the water at least once a day. This helps to remove some of the bitterness of the olives, and the salt brining will complete the process. You will see that the cracked green olives, which have more surface area exposed, will de-bitter quickly, turning from bright green to a drab…well, “olive ” color. You should be able to almost eat one of these without grimmacing and 7 -10 days should do the trick.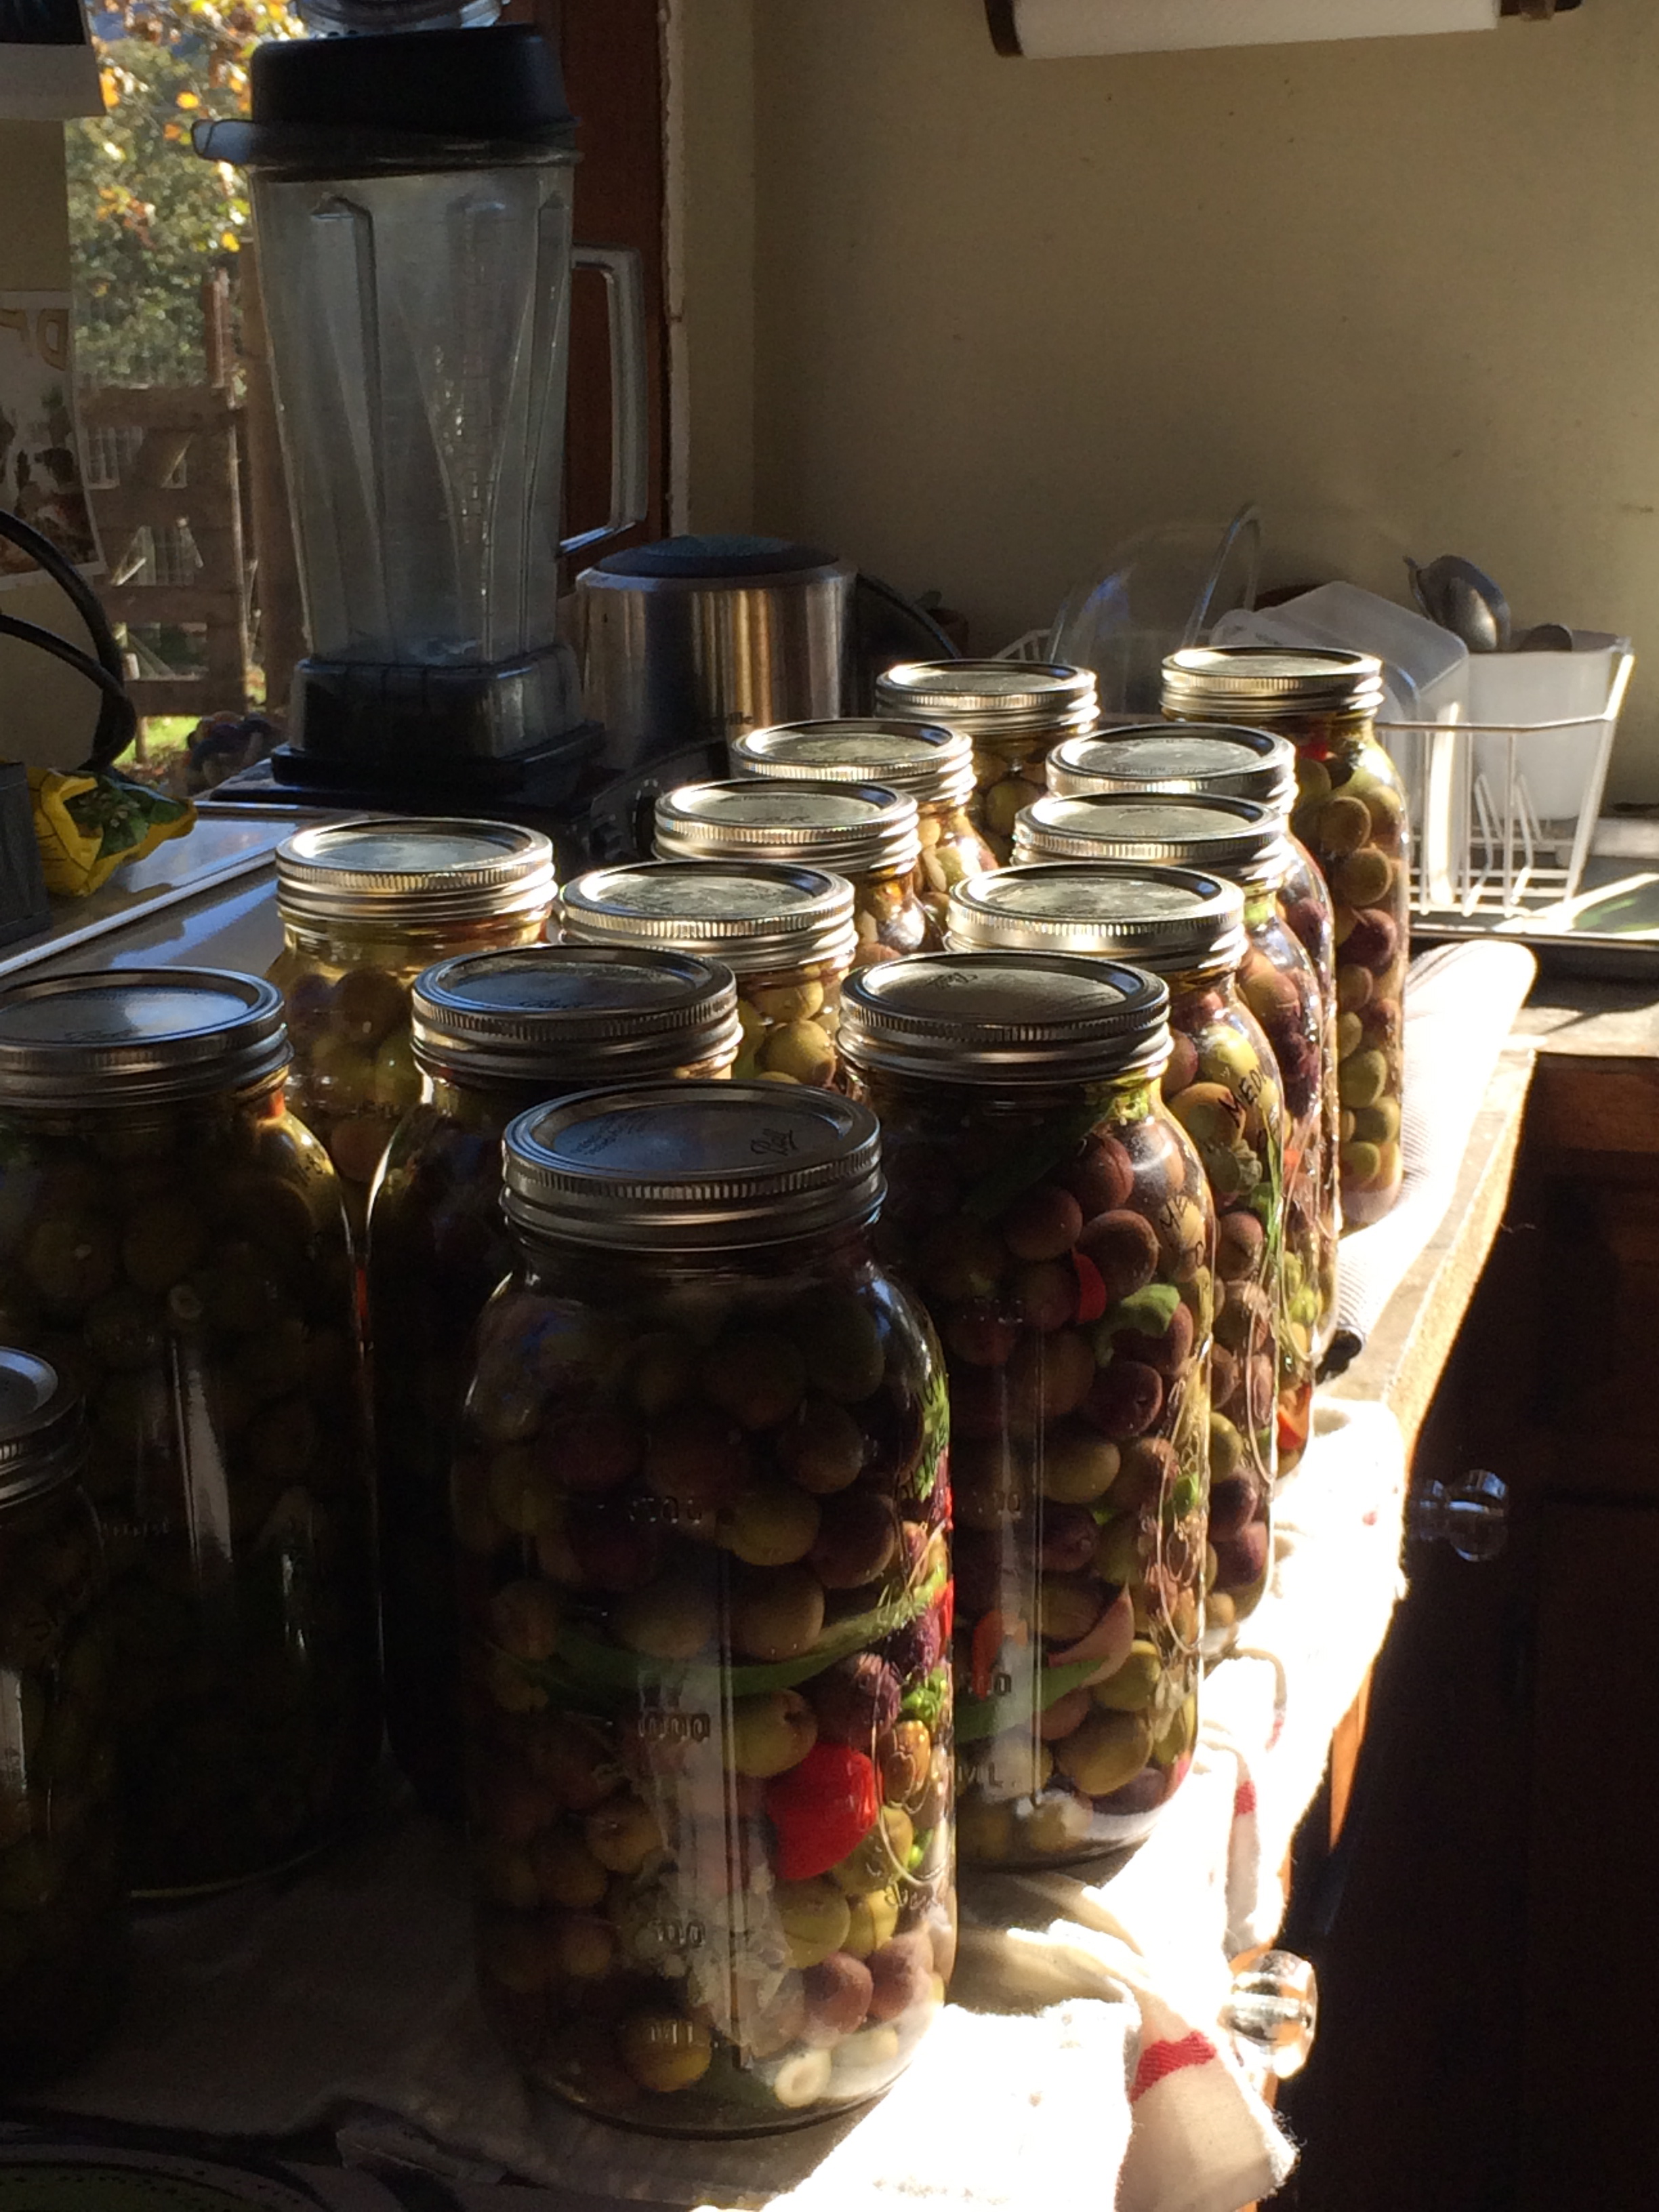
The less ripe end of the scored olives might take a few days longer – you will see them also change color. I pulled all of this batch after 7 days because of my own time restrictuions (I needed to get to NYC: Sometimes the slow food movement clashes with my jet-set lifestyle…) This will just mean a longer cure in the salt brine… it can take sometimse up to a couple of months for the bitterness to leave the olives this way.
If you soak the olives in water longer – 10 days to 2 weeks even – you can reduce the brine curing time (and the entire curing time) to only a few weeks. These olives will tend to be less bitter, but sometimes a bit softer than olives cured using the longer brining method.
Make the Brine:
A day before your olives are ready to escape their water bath, heat one gallon of water, add salt, and stir to disolve. Add remaining two gallons of cold filtered water. With your mallet, lighly crack the garlic cloves, and let sit out for at least 10 minutes to oxidize**, and then drop with peppers, herbs and spices into your bucket. In Spain, Jose lightly muddled the peppers with the garlic and herbs with a large mortar and pestle before adding to the salt brine, but I decided not to do this on this round. Too messy!
 Add 2/3 of the white vinegar and taste. I make half the olives at this dilution, and then add the remaining vinegar to the other half of the batch, making some of the olives a bit more vinegary. (Alternately, you can leave the vinegar out. Tradicionally the Andalucian olives are made only with salt).
Gently fill 15 half gallon mason jars with olives, nearly to the top. Pour brine evenly over olives, leaving 1/4 to 1/2 inch below the lip. Tap lightly on the counter to release bubbles, then top with olive oil to the rim. Carefully screw the jar lids on, leaving as little air in as possible.
Store olives in cool dark place, or (ideally) refrigerate. They are ready when they have lost their bitterness, and this can take from 3 weeks to 3 months, depending on the variety and ripeness of your olives, the length of your soak time, etc. You can try the cracked green olives in 3 weeks, but the scored olive will likely take a month or two to finish. To taste, fish out an olive or two, and then top off the jar with a splash more olive oil, keeping the olive submerged under the oil and as air-free as possible.
Buen Provencho!
* Using Celtic Grey Salt: I know… it’s crazy to spend $4 a pound on salt right? Wrong. Suck it up and spend the money on high quality, high mineral salt whenever you can. Using good salt to naturally preserve and cure olives is a no-brainer and makes them even more special… I consider them medicinal!
** Releasing Allicin: When crushed, raw garlic produces a powerful antibacterial, antifungal and antiviral sulphuric (stinky) compound called allicin. Within 5 minutes of being crushed and exposed to air, garlic explodes into a variety of sulfur-containing compounds which are supposed to be very good for the heart, lowering blood pressure and releasing more oxygen to the blood stream (always a good thing!). Studies have also shown that raw garlic a powerful anticarcinogenic, internally halting the growth of cancerous tumours in the body.
***What’s in an Olive?
Raw cured olives are chock full of healthy, monounsaturated fat and loaded with antioxidant and anti-inflammatory nutrients. Green olives are higher in oleic acid, which has been shown to decrease blood pressure, while black olives contain more iron and vitamin E. Both also contain serotonin, the hormone which triggers your body to feel satisfied… how good is that? Eat your olives!
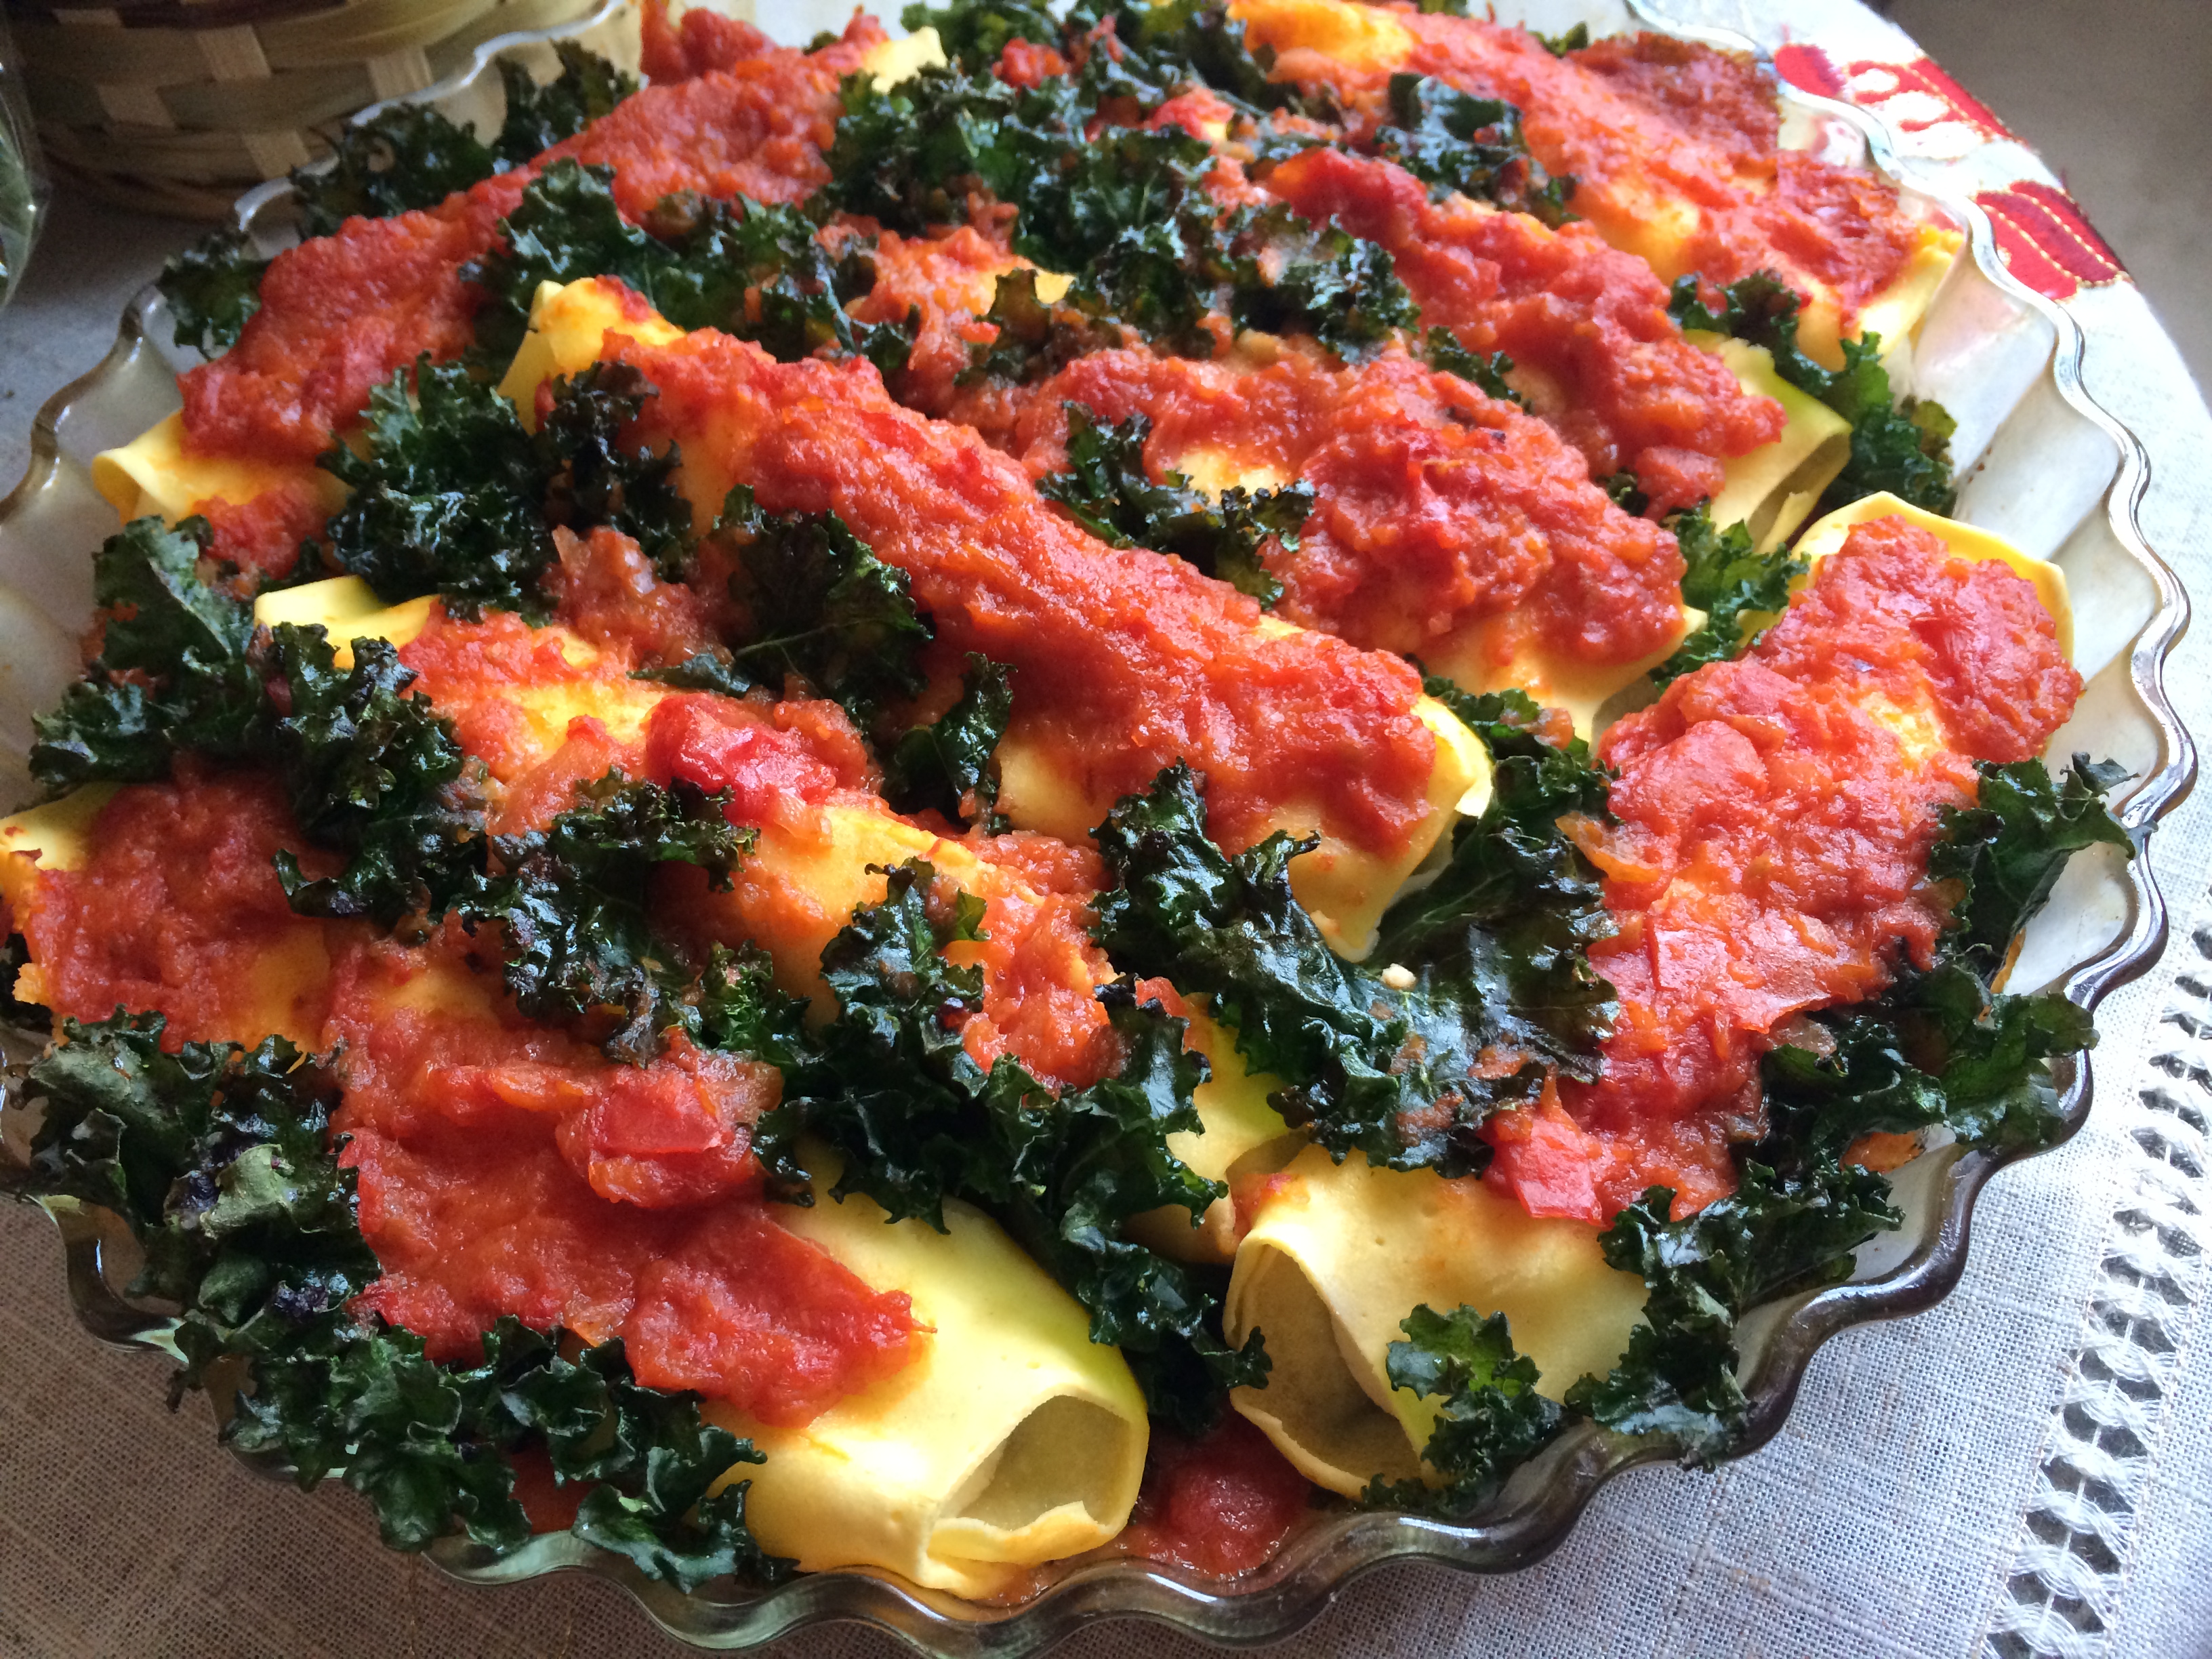
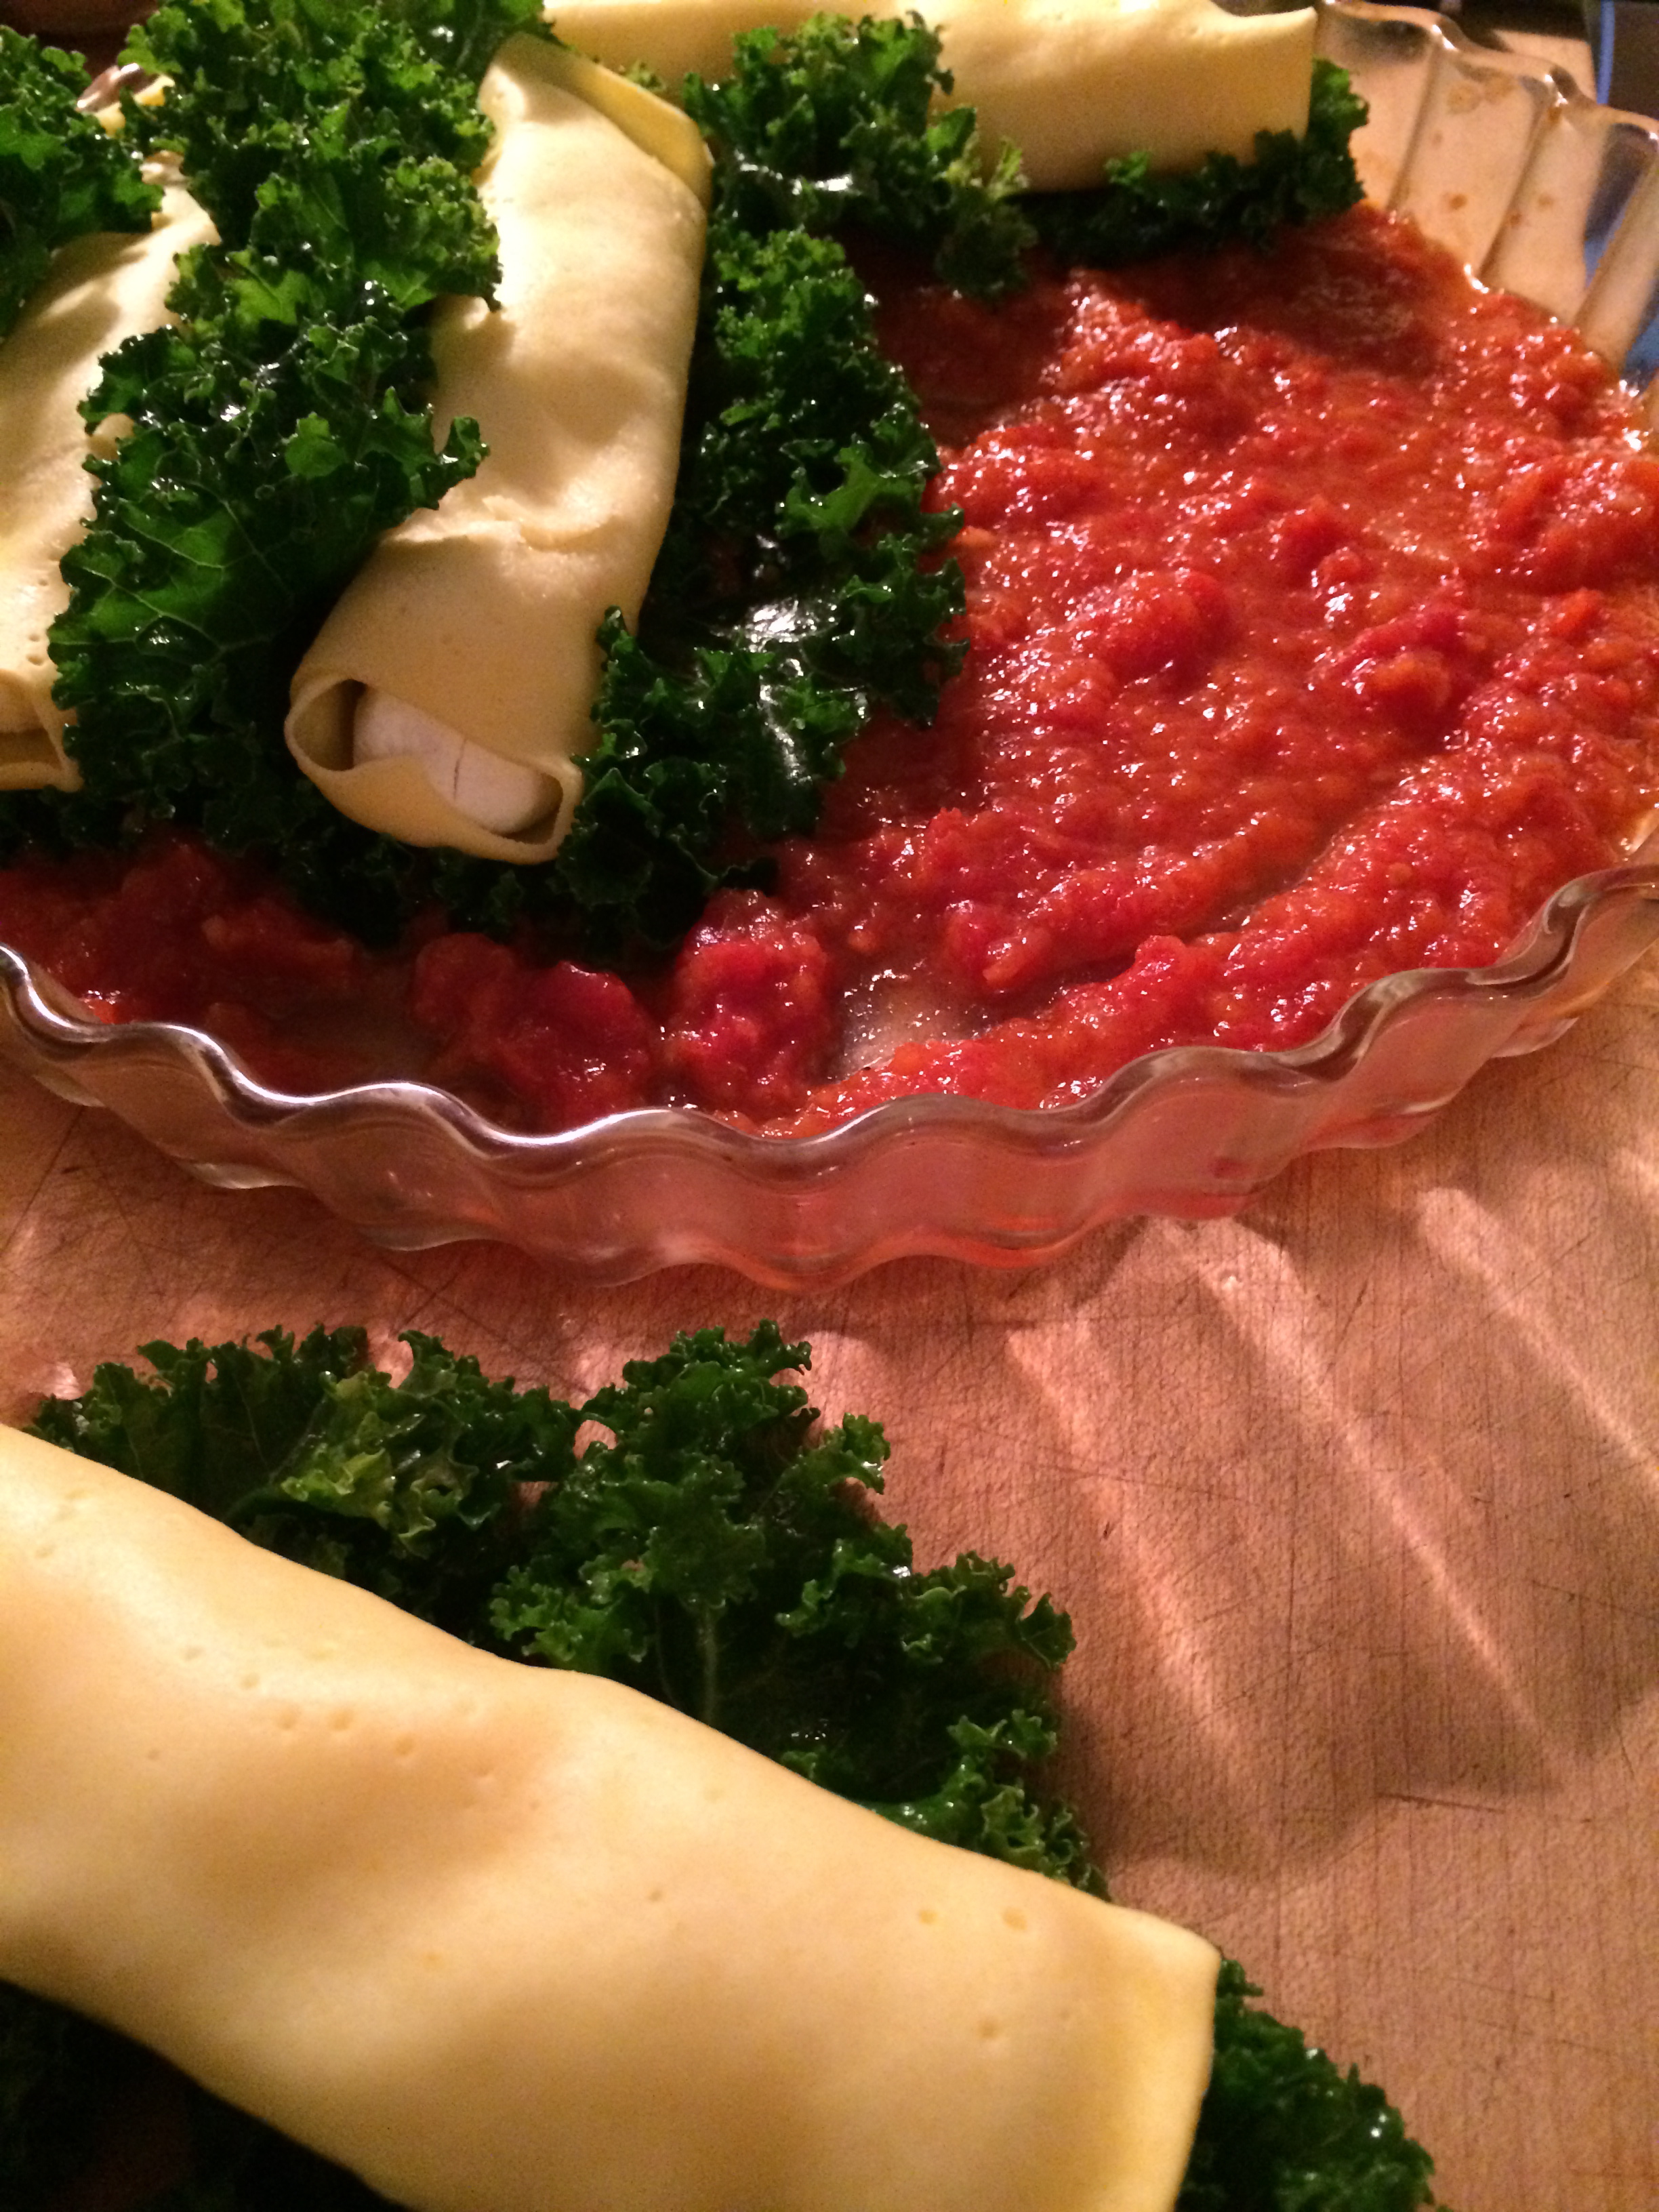
Baked Manicotti with Kale (Merry Christmas!)
 Ok – it’s time to get into the extra-cheesy holiday recipes. Really, I just wanted to post a recipe for Vodka Sauce, but perfecting the vodka…(sauce) recipe, combined with a couple of rounds of Santa Claus, Go Straight to the Ghetto on Christmas Day, we are now well into the Harlem Holiday Spirit!
Baked Manicotti with Kale for 4
- 1/2 recipe Vodka Sauce
- 8 large leaves curly leaf kale
- 8 fresh manicotti (I used fresh, store-bought)
- 1 t. olive oil
- 1t. white balsamic vinegar
- Pinch of salt
 Prepare the Vodka Sauce.
Prepare manicotti if making from scratch (ok, I promise a recipe for this some day. In the meantime, see what your local Italian deli has available. Stuffed shells would be awesome here too).
Wash and dry kale, and cut the rib off each leaf. Toss in a bowl with olive oil, vinegar and a light sprinkle of salt and massage lightly to coat. Partially wrap each manicotti in the seasoned kale leaves, leaving to top edge bare. Patching a few leaves together here is fine – try to get a lot of the nice frilly leaves top-side since these get wonderfully crunchy when they bake.
Lightly coat baking dish with olive oil and cover bottom with a thick layer of sauce. Arrange kale-wrapped manicotti in dish and spoon remaining sauce carefully over bare manicotti’s, leaving the edges to peek out a bit.
Lightly cover top with aluminum foil (do not tuck in). Bake for 30 – 35 minutes in 350° oven, until manicottis are hot through, sauce is bubbling, and kale is crunchy but still green.
Merry Christmas!
Vodka Sauce for Uncle Warren

Vodka Sauce used with Baked Manicotti with Kale
This is probably my all time favorite pasta sauce, taught to me over 20 years ago by my dear friend Silvia Pavani, one of the best cooks I have ever met. I am eternally grateful to her for infusing me with the joy and passion for great pasta (and great coffee!)
This recipe has probably deviated quite a bit over the years, since I just wing it every time I make it now. I was encouraged by Silvia’s own adventuresome spirit – she made this sauce without finishing it with heavy cream, as is traditional. She said it simply “wasn’t necessary” and I think she was spot on. I have never had a better Vodka sauce, and it’s easily made vegan.
It is a nostalgic recipe for me, full of old times and dear friends. It is a sauce full of love and memories. And recently I had the absolute pleasure of making it for my dad’s older brother, my Uncle Warren – an avid pasta fan who’s total delight in every bite made the recipe even sweeter. This one’s for you Uncle Warren!
(Pasta alla) Vodka Sauce
- 2 medium onions
- 1/2 cup water, plus more as needed
- 1/2 cup Vodka (split)
- 1/4 c butter (or substitute olive oil)
- 3 T olive oil
- pinch or two red pepper flakes
- 1/2 t salt
- 1 large (28 oz) can diced or whole tomatoes (Use high quality like Muir Glen)
- 1/4 c freshly grated Parmesan cheese (optional)
Prepare the Vodka Sauce:
 In a blender, puree onions, water and first 1/4 cup vodka until smooth. Set aside.
In a large, heavy skillet, melt butter and olive oil over medium heat. Add a pinch or two of red chile flakes and fry for a split second before pouring onion puree into the pan. Add salt and mix well to combine. Cook over medium heat for 10- 12 minutes, stirring occasionally, until all the water is evaporated and onion puree is mild and sweet. Do not brown. When the onions start to noticeably fry (listen to them!) after 7- 8 minutes and look like a paste,- then add a splash of water (2 T), stir to deglaze the pan, and let cook down some more. Hover, stir, let cook, taste, add water, let cook, hover, stir…I do this 3 – 4 times, depending on the sharpness of the onions. Be attentive and do not skimp on this step – the flavor and sweetness of the onions carries the whole sauce. It will take about 10 – 20 minutes.
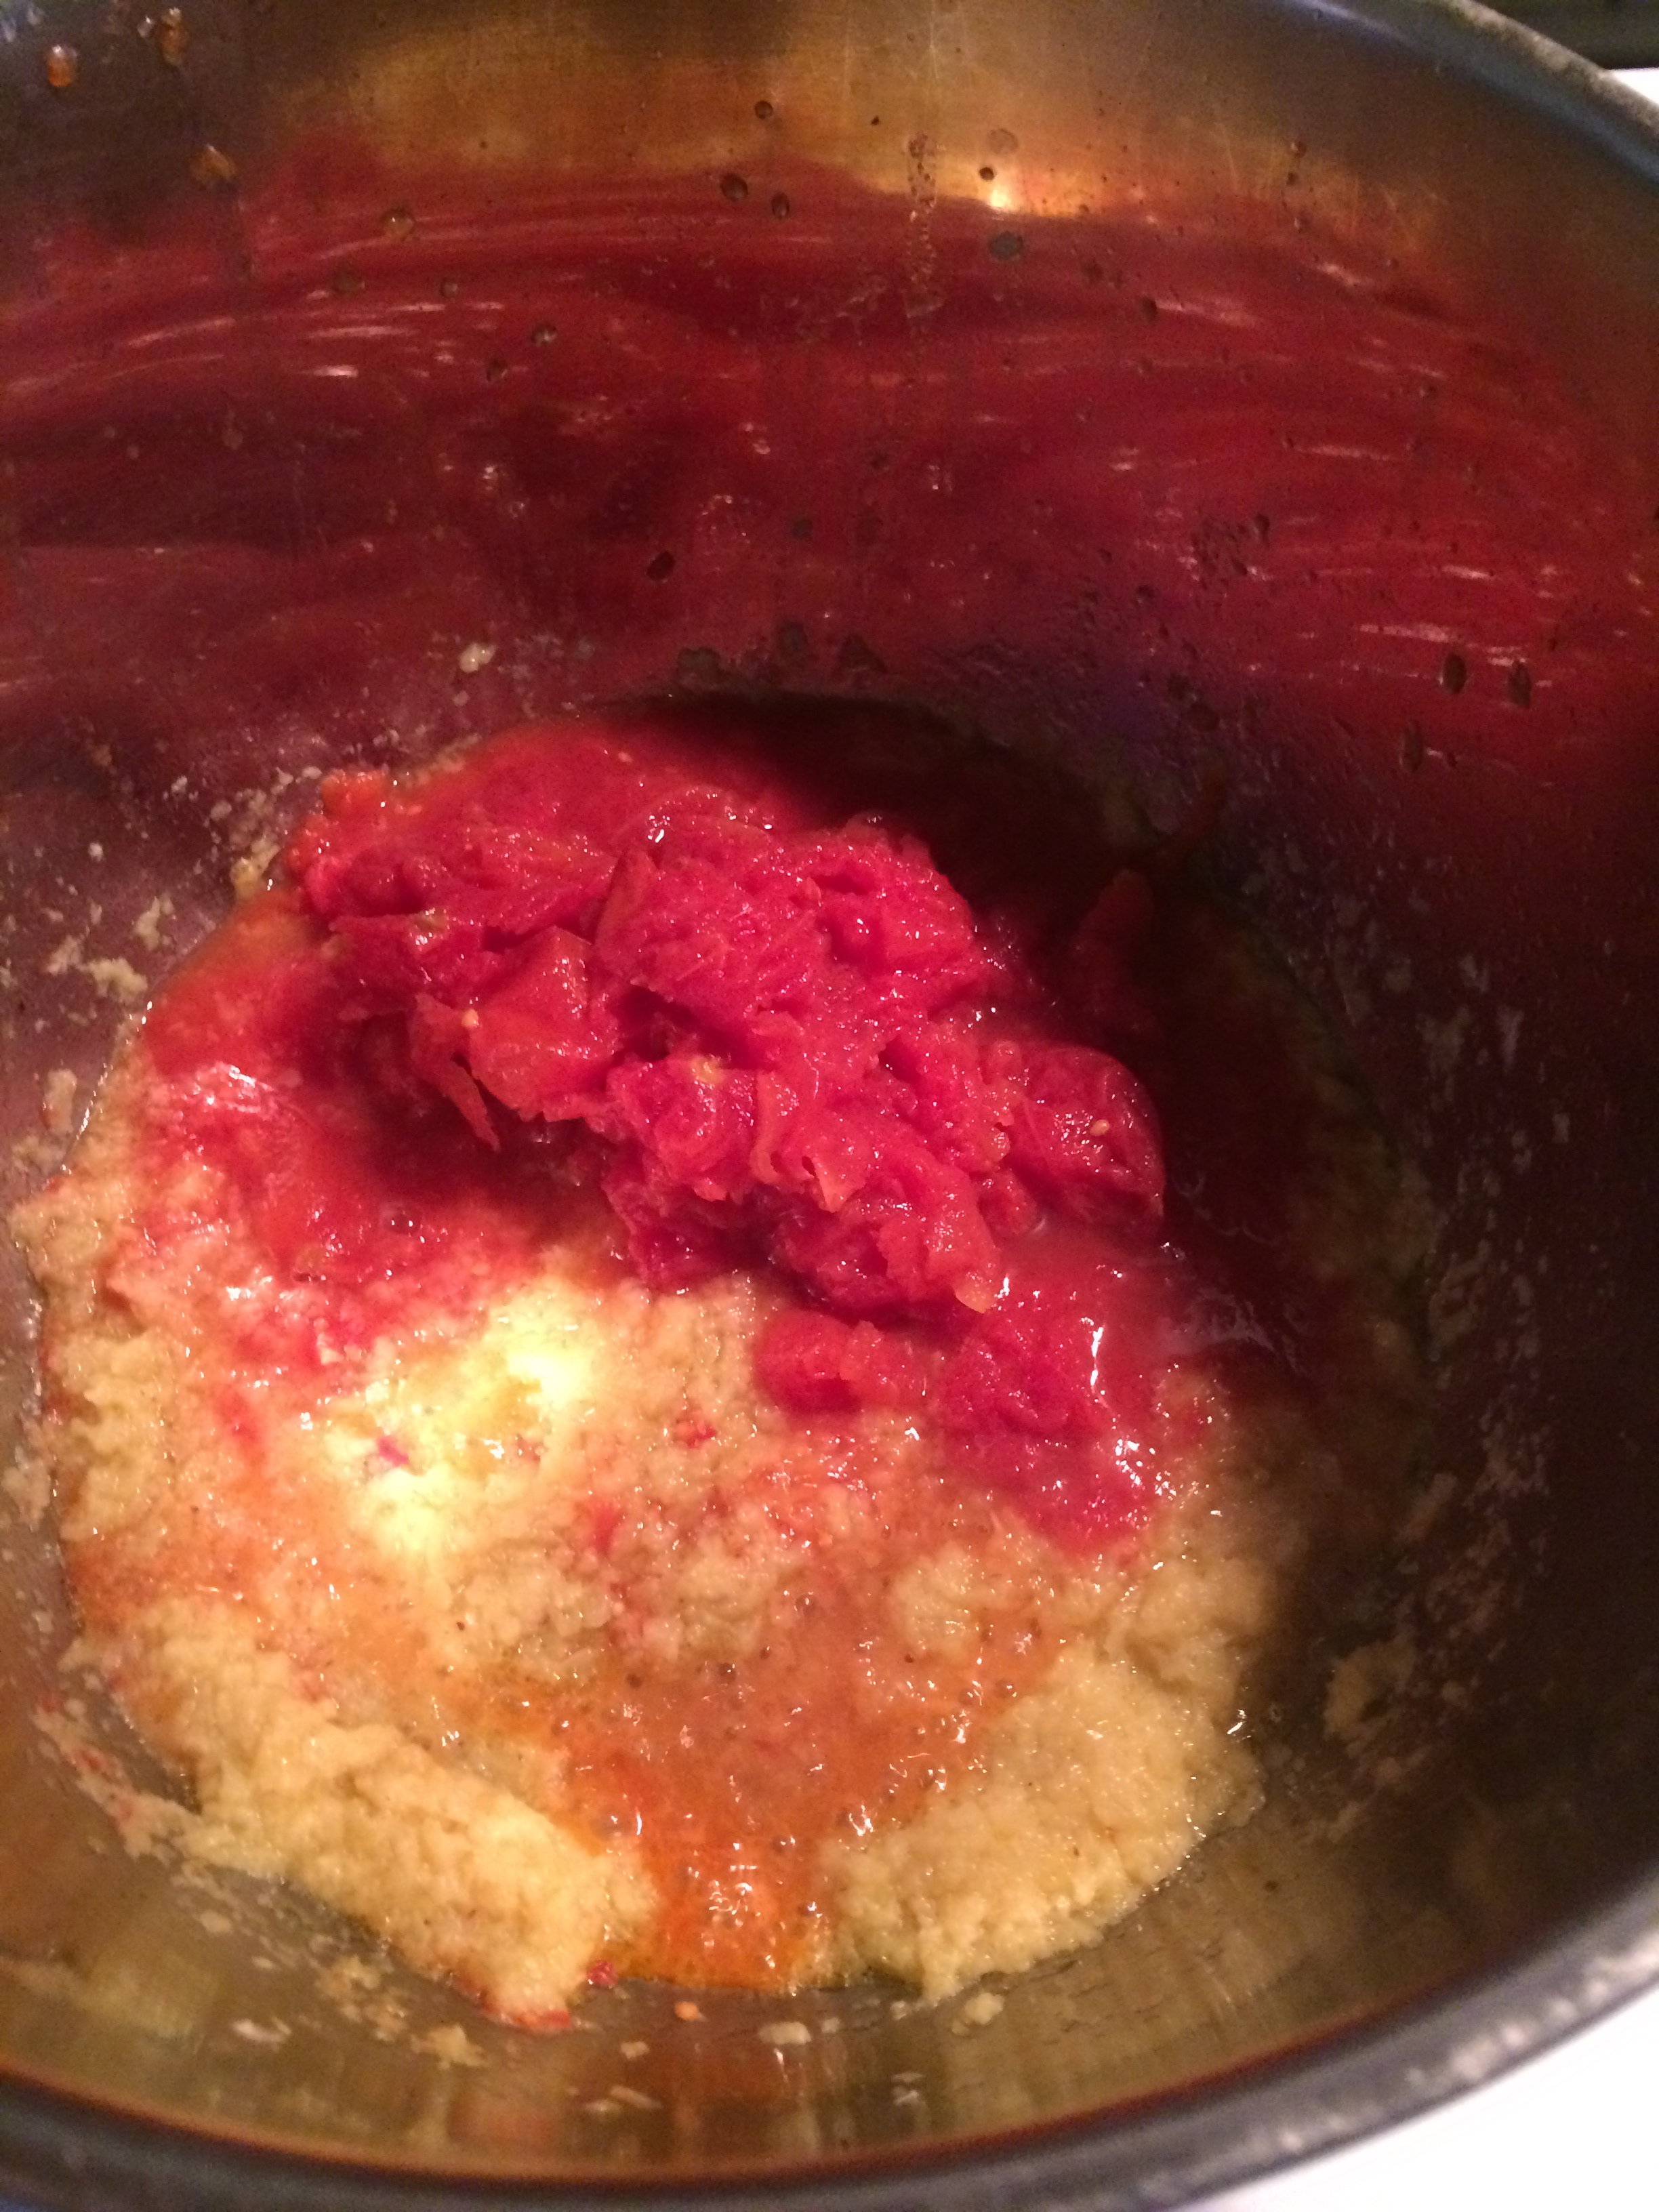
When all the water is cooked out and the onion paste is very sweet and has lost it’s bite, it is time to add the tomatoes: do this by reaching into the can with one hand and grabbing handfuls of diced or whole tomatoes and crushing them BY HAND, squishing them though your fingers into the bubbling onions. (Don’t ask me why this makes it taste good, but it does).
Hold back on adding in the juice until all the tomatoes are in the sauce: saute the tomato pulp for a minute, then add in juice from the can. Stir and cook over medium-high heat for about 4-5 minutes – this part goes quick. Taste and adjust for salt (you can use 1/4 – 1/2 t more here) If you are using good tomatoes, the sauce should be sweet enough, but add 1/2 t of maple syrup or coconut sugar if there is any hint of acidity left at this stage.
Turn off heat and add remaining 1/4 c vodka to pan. Stir well. The idea here is that MOST of the alcohol in the vodka will burn off with the heat of the sauce, but some of it will sneak into your tomato chunks and just make them indescribably yummy. Do not simmer this sauce to keep it warm – if you need to wait on the pasta, keep the sauce off the flame until the very last minute, then heat briefly just before serving.
I use this sauce in a number of recipes, including Baked Manicotti with Kale. But my favorite basic go-to pasta recipe is…
Pasta ala Vodka (for 4)
- 1 pound high quality pasta*
- High quality sea or other high-mineral salt
- Splash of olive oil
Somewhere around the time you start to cook the onions, get your pasta water going. Bring water to a rolling boil in a large pot and SALT IT WELL – it should be briny like the ocean. Please do this. It sounds simple and I know we American’s get fed all sorts of anti-salt propaganda, but trust me – well-salted water is the secret to great pasta. And great pasta is good for the soul.
Cook pasta al dente and drain immediately, return to pot and add a splash of olive oil to it. Toss in the pot to coat pasta in olive oil. If you salted the pasta water well, the pasta should be good enough to eat at this stage without any sauce at all.
Add sauce. 🙂 Toss briefly, adding grated Parmesan if using.
Serve immediately with extra Parmesan on the side. Buon Appetito!
*A Note on Pasta: I have recently been experimenting with gluten free pastas, and have found that the Tinkyada brown rice pastas are great. Feeding a regular crowd? Don’t tell anyone… they will never know.
Rich Spanish Lentils with Quinoa
 These lentils are so rich, hearty and satisfying – they can be served alone in a big bowl as a standalone Winter meal, or offered as a tasty first course to a larger meal, as it is often served in Spain. The addition of quinoa was inspired by the commonly used Spanish technique of starting many vegetable dishes by frying chunks of stale bread, or breadcrumbs in lots of olive oil, garlic and pimentón – the sweet, slightly smokey, Spanish paprika. The Castillian Sopa de Ajo, (Garlic Soup), is traditionally made this way. So it got me wondering what would happen to start with a base of quinoa, rather than bread…
So this soup is a hybrid between Sopa de Ajo Castellana, and the Andalusian Sopa de Lentejas, with my Californian non-gluten twist…
Spanish Lentil Soup with Quinoa – Serves 6 – 8
- 1 large onion, diced
- 1/4 c. extra virgin olive oil
- 4 garlic cloves, crushed
- 1/2 t. high quality, high mineral salt
- 1/2 t. freshly ground black pepper
- 2 carrots, diced
- 2 stalks celery, diced
- 1/2 cup dried quinoa, rinsed very well and soaked one hour or more
- 2 t. sweet paprika
- 2 t. Spanish pimentón
- 6 cups water or vegetable stock
- 1 T soy sauce
- 2 whole bay leaves
- 2 T nutritional yeast
- 1 t. ground cumin
- 1 t. salt
- 1 cup brown lentils, rinsed and soaked one hour or more
- 1/4 green bell pepper, or 1 jalapeno pepper, seeded
- 1 sweet potato, peeled and cut into chunks
- 1 potato, peeled and cut into larger chunks
- 1/4 c red wine, to taste
- 1/2 t. umeboshi vinegar, or Braggs Amino Acids (optional)
- 1/2 cup fresh flat leaf parsley leaves
Saute the onion with olive oil and a pinch of salt in the bottom of a large, heavy-bottomed soup pot, until golden brown and starting to caramelize – about 10 minutes. Add garlic, carrots, celery, salt and pepper and saute gently for about 10 more minutes until completely cooked, stirring occasionally and deglazing sides and bottom of pot with water every once in a whole as needed to keep it from sticking. This long slow cooking process at the beginning sweetens the vegetables and is what gives richness and depth to the soup, so make sure to put the time in here.
Stirring constantly over medium flame, add quinoa, paprika and pimentón, toasting the quinoa for a few minutes in the hot oil. Add water/stock, bay leaves, cumin, soy sauce and nutritional yeast, and 1 t. salt, lentils, green peppers, sweet potato and potato chunks. Bring to a boil and simmer gently for 30 -45 minutes, or until lentils are cooked but firm and potatoes can be cut with a fork.
Taste and add red wine and a splash of umeboshi vinegar or Braggs amino acids. (These give the “6th sense flavor” which the Japanese call umame. Soy sauce can also be used). Thin with water if necessary to desired consistency. These lentils can be served thin and soupy or very thick, piled up in a shallow bowl, depending on your preference. Adjust salt and freshly ground black pepper. Mix in fresh parsley just before serving.
These lentils are great with a side salad and thick slices of toasted garlic bread, or served alongside Tortilla de Patatas (a Vapor!).
Spanish Tortilla de Patatas (a Vapor!)
 No vegetarian has ever gone to Spain without overdoing it on the ubiquitous “Tortilla de Patatas”. It’s basically a thick potato omelette which is served on it’s own, as a side dish, as a tapa, and in sandwiches everywhere in Spain. I usually avoid them when I travel, (viewing them as an emergency bus-stop lunch item), but if you can find someone local to make you a a really good tortilla de patatas, fresh, it can truly be a sublime experience.
Here is the catch: after pestering many of our local Andalusian neighbors to show me how to make the real thing, I discovered that what makes the really good tortilla so delicious is that they are basically deep-fried from the inside out. Cut potatoes are slow cooked in massive amounts of olive oil for a long time, before being mixed piping hot with beaten egg and fried again slowly to set into the iconic tortilla shape. And I have to admit that when I am in the Suryalila kitchen, staring over the shoulder of a skilled Andalusian who is enthusiastically deep-frying hand-cut potatoes in a big sarten of homegrown olive oil, it all seems just fine… like the most natural thing in the world. But back here in my own kitchen in NYC, the thought of deep-frying potatoes in cups of olive oil sounds worse than appalling.
So I decided to see if I could make an authentic-tasting potato tortilla using steamed potatoes instead of fried. And… it’s good! Not sublime… but almost as good as the real Andalusian thing, still using a high quality extra virgin olive oil but with no deep-frying required at all.
Why is this important? In addition to a lot of controversy olive oil becoming unstable when heated to smoke point, there is also a carcinogenic chemical called acrylamide which is produced during high heat cooking of certain starches, like potatoes. Keeping cooking temperatures under 248°F reduces acrylamide levels significantly, so steaming and boiling potatoes is much healthier than deep-frying or baking.
Tortilla Español with Steamed Potatoes – Serves 8
- 2.5 pounds potatoes (around 5 – 6 medium)
- 1 onion, sliced
- 6 eggs
- 3 T. extra virgin olive oil
- 2 t. salt
- 1/2 t. freshly ground black pepper
 Cut potatoes into small pieces: In Andalusia, tortilla makers turn each potato in their hand, slicing off small evenly sized scallops from around the top edge with a paring knife and allowing each piece to drop into a bowl of cold water. This gives an interesting shape and allows the egg to slip between the cracks in the final tortilla. Steam the potatoes for 10 – 15 minutes until very tender, but not mushy. Keep hot.
Meanwhile, in a 8″ – 9″ heavy non-stick sauté pan with steep, curved sides, sauté onions in 1 T olive oil and a pinch of salt until soft, sweet and golden brown. Add steamed potatoes to the pan and sprinkle with 1 t. salt, tossing gently lightly to coat. Remove from heat.
In a large metal mixing bowl, whisk together eggs, 1 t. salt and pepper until completely combined. Add hot potato-onion mixture and mix gently to combine.
Clean sauté pan and reheat with 1 T. olive oil until it shimmers on medium/high heat. Add potato/egg mixture all at once and immediately even out potatoes, pressing middle of tortilla down firmly in the middle and allowing the outer edges to creep up the pan.  Lower heat to low/medium and run your spatula around the sides, pushing the egg/potato mixture down the sides of the pan towards the middle, rounding the edges and compressing the tortilla again. Repeat this squishing down and scrunching up movement a couple of times in order to ensure that the egg is releasing from the bottom of the pan, and also to put the maximum amount of egg in touch with the hot pan and potatoes. Allow the tortilla to cook slowly on low heat for 5 -10 minutes, peeking in after 5 and reducing heat to make sure the bottom is not getting too brown.
For a nice video showing how the Spanish handle a tortilla (in full fat glory!) please see here: http://www.youtube.com/watch?v=pvlkYYdIBV0
Flip the Tortilla: When one side is golden brown and has been cooking for 8 – 10 minutes, it is time to flip the tortilla. This takes a bit of practice, not because you need skill, but because it takes confidence to perform a whole-hearted flip. So, if you psych yourself into it, you can do it perfectly on the first try. Ready? (Watch the above video again, then put on some Paco de Lucia to get into the vibe, then go for it!)
Find a rimless plate or a large pot lid that is at least an inch or two larger than your saute pan and one which is relatively flat( slightly curved towards the middle is fine, but you need to be able to slide the tortilla off the plate so no edges…)
 Run your spatula around the edges of your pan and jiggle it a bit, to make sure the tortilla is completely free on the bottom from the pan. then put the plate, upside-down, on top of the tortilla, and in one bold move… FLIP IT OVER. Do this fast and with complete commitment… and maybe also over a sink. The worst thing that will happen is that you get a bit of egg on you, but most likely, you will remove the pan and end up with a beautiful golden brown, half-cooked tortilla on your plate.
Return the pan to the heat (wipe it clean), add the remaining 1 T olive oil, bring it to a shimmer and slide your tortilla – raw side down of course – back into the pan. Do the smash and tuck thing a couple more times, gently, then reduce the heat and allow to firm up for another 10 minutes or so. Poke the tip of a knife into the middle and squish the spatula down to make sure the middle is firm, and cook a bit longer if any liquid comes out.*
Remove pan from heat and take a peek at the bottom to decide which side of the tortilla is the better looking, and then either slide or flip onto a serving platter, depending on which side is more gorgeous one (and how much you just want to flip that thing again…)
Allow the tortilla to sit out on the plate for at least 15 minutes to firm up or allow to cool to room temperature before serving.
*The egg in the middle of the tortilla should be just moist and slightly shiny – not cooked all the way through. The Andalusians really take this seriously and like it …wet. So, find what you are comfortable with, but if you find it’s too wet, you can always slide it back into the pan for a gentle reheat.
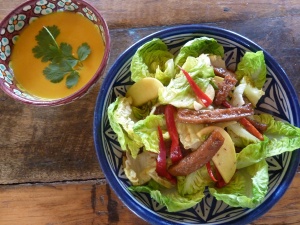
If to be served on it’s own, cut into 8 pieces and try it alongside the Rich Spanish Lentil Soup with Quinoa and a tossed green salad.
Enjoy leftover tortilla in other ways:
- As a Bocadillo (sandwich): serve a warm slice of tortilla topped with a whole roasted green pepper in a split fresh baguette. (yes… I saw this one at the Madrid Airport).
- As a Tapa: cut tortilla into smaller, two bite squares and serve open face on a 1/2″ round slice of lightly toasted baguette, topped with a piece of smoky red piquillo pepper and a sprinkle of parsley.
For a vegan version of this recipe, check out my (utterly inauthentic, but still good) Spanish Tortilla..with a Twist!
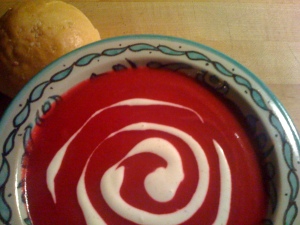
Creamy Beet Borscht with Horseradish Swirl
 Borscht is one of those things, like art, that everyone has an opinion about, but really, what is it? My friend, the artist John Fadeff, who I think is also qualified to speak on this by nature of his fine cooking ability and Russian last name, told me that borscht in his family was anything that started with: 1 onion, 1/2 head of cabbage, and 3 beets, and then they would put all sorts of stuff in it afterwards, greens, beans, even meat. Really, anything goes with borscht – look it up in Wikipedia – there are a bazillian varieties out there and everybody’s got one (they even make it in China, with tomatoes instead of beets), but anyway, per Mr. Fadeff: 1 onion, 1/2 cabbage and 3 beets is the basic ratio I always start with.
This borscht is the hot, thick and creamy kind – which I was recently told is the Hungarian variety, as opposed to the chunky Russian kind, or the chilled ones with dill and egg, or all the other variations there seem to be out there. The horseradish addition I am crediting to my friend Katherine, from Kosmic Kitchen, who used to do a horseradish sour cream to top a delicious red root soup (also a borscht, I guess: beet soup – with the addition of carrots, parsnips, ginger and all sorts of sweet rooty deliciousness.) I also adopted the ginger from her because I really like the warm spicy complexity it adds. This soup is all about balance of opposites: sweet, sour, spicy, smooth, hot, cold and creamy. It’s a perfect with a loaf of hot whole grain bread and salad.
Creamy Beet Borscht for 8
- 2 large onions, in 1/2″ slice
- 1 smallish head of cabbage, cut into 1 – 3″ pieces
- 1 T. olive oil
- 3 huge beets or up to 6 medium ones, sliced thinly
- 1/2 t. white pepper
- 1 – 2 t. Himalayan or other high mineral salt
- 2 whole bay leaves
- 6 -8 cups water
- 2 t. balsamic vinegar
- 1 t. apple cider vinegar
- 1 – 2 t. maple syrup
- 1/2″ fresh ginger, chopped coarsely
In a large, heavy bottomed soup pot, saute onions and olive oil with a pinch of salt until sweet and slightly caramelized. About 5 minutes. Add cabbage, salt, pepper and bay leaves and continue to cook over medium flame, with the top half on, until the cabbage softens and also starts to caramelize, about 10 more minutes. Stir occasionally, and add a little water as necessary to deglaze the pan and keep it all cooking away. Add beets to the pot, and then add water (eyeball it) to about an inch or two over the vegetables. Bring to a boil and simmer for 30 minutes or until the beets are thoroughly cooked though.
Remove bay leaves and blend with ginger in Vitamix or blender until completely smooth. Return to pot adjust for salt and pepper, then add vinegars and maple syrup, cautiously. The soup should be both sweet and slightly sour, and how much you add will depend on how naturally sweet your veggies are, how patiently you caramelized them, and how acidic your type of vinegar is. In any case – if it is not already “mmm… wow” ad this point, keep adjusting.
(This soup freezes really well – I do a large batch and freeze half of the batch for later).
Serve with a scoop or swirl of Tangy Horseradish Yogurt Sauce or Vegan Horseradish “Sour Cream” in each bowl.
Tangy Horseradish Sauce (Vegan and Non)
When I was growing up, my Japanese grandmother – whom we all called “Granny” – used to make a sauce with Best Foods Mayonnaise with a bit of soy sauce in it and serve this as a salad dressing on sliced tomatoes. I know – it sounds weird…(Japanese meets 1950’s style middle American food culture!), but actually, you know, it’s a great combination. I ate “Granny’s Best Foods Sauce” on everything when I was growing up – it was my favorite dip for steamed artichokes (still basically is) and its also great with asparagus spears, whole blanched green beans, spears of broccoli or broccolini or broccoli rabe… this sauce totally makes veggies fun!
Over the years I played with adding other flavors like horseradish and capers, and started cutting the mayo with sour cream, then yogurt, and then finally, eliminating it all together in favor of a raw vegan version. At any given time I usually have a couple of versions of this sauce in my refrigerator – maybe one with cumin and lime to drizzle over anything Mexican, and usually a horseradish or caper version for artichokes or any other steamed vegetable. I also float a spoonful of this in my Creamy Beet Borscht soup recipe….
Tangy Horseradish Yogurt Sauce
- 1/4 c whole milk yogurt, (or Greek yogurt, or sour cream)
- 1 T mayonnaise (I grew up with Hellman’s/Best Foods and nothing else tastes right to me)
- a few drops of soy sauce (really, about 1/8th teaspoon – this makes it, and no one will know)
- 1 t. horseradish (fresh, grated, if you can get it, or prepared is fine – look for “hot”)
Whisk together well in a small bowl. Serve with anything!
Vegan Horseradish “Sour Cream”
- 1 c cashews, soaked 4 – 6 hours
- 1/2 c water
- 1/4 olive oil
- 2 T lemon juice
- 1/2 t salt
- a few drops of soy sauce (really, about 1/8th teaspoon – this makes it, and no one will know)
- 1 few drops of umeboshi vinegar (optional)
- 2 t. horseradish (fresh, grated, if you can get it, or prepared is fine – look for “hot”)
Blend all ingredients, except horseradish, in a Vita-Mix until completely smooth. Mix in horseradish. Thin with water if needed to achieve desired consistency.
Play with it!
- Add cumin and lime juice – use it alongside salsa and guacamole to top tacos, tostadas and anything else vaguely Mexican.
- Replace horeradish with chopped capers, ad a bit of garlic and fresh lemon for another nice artichoke sauce.
- Leave out horseradish and serve plain.
Silky Ginger Carrot Soup
 It’s starting to get blustery and cold in New York City, and all I want to do is hole up in my cozy apartment and make soup! This soup is very versatile – I made it simply ginger for an Asian-y accompaniment to my vegetarian “Chinese Chicken” Salad and Sesame Scallion Buns meal last fall, but it can just as easily be Mexican-ed up by replacing the ginger with cumin and adding a pinch of oregano.* (And for an awesome raw version, check out this one: Warm Winter Carrot Soup.)
The secret of this soup is to get it really really smooth – it will be ok done in a blender, but it is divine when made in the Vitamix…
Silky Ginger Carrot Soup for 6
- 2# carrots, peeled and thinly sliced
- 2 medium onions, sliced evenly
- 2 T olive or coconut oil
- 1 t. Himalayan or high mineral salt
- 1/t t. white pepper
- 2 bay leaves
- 4 cups water or vegetable broth
- 1/2 cups raw cashews, soaked for 2 hours and drained**
- 1 – 2 cups water
- 2 – 3 T. fresh ginger, grated
- 1 – 2 t. maple syrup (optional)
- 1/2 t. umeboshi vinegar or squeeze of lemon (optional)
In the bottom of a heavy-bottomed soup pot, saute onions with salt and pepper in oil over medium heat until starting to caramelize, about 10 minutes. Add carrots and bay leaf and sweat them another 10-15 minutes, stirring occasionally, with a lid loosely on the pot. Add enough water to cover carrots (about 4 cups, but you can eyeball it), bring to a boil, and cook until the carrots are tender enough to cut with a fork, but still bright orange. About 10-15 minutes, depending on how thinly you have sliced them. Remove bay leaves, add cashews, and blend in Vitamix very well, being careful to start slowly with the top securely on. You can bring the soup up to the highest speed and then leave it there for at least a minute. I walk away…
Add grated ginger, ume vinegar and 1 – 2 cups water, slowly, thinning to desired consistency. Add maple syrup, salt and pepper to taste. Finish with a splash of umeboshi vinegar, or a squeeze of lemon. Rewarm lightly if not serving immediately, but do not boil.
Serve garnished with a few sprigs of fresh cilantro, or thinly sliced scallion tops.
*This recipe can also go East Indian if you do ginger, cumin, coriander and turmeric with the onions, or Moroccan if you do all of the Indian spices but add cinnamon and a pinch of saffron in the with carrots… play with it!
**You can replace the cashews and 2 cups water with almond milk, or hemp, soy or oat milk.
Sesame Scallion Buns
These are really fun buns – stuffed with scallions and rolled up like a big green jelly roll. I went with Asian – scallions and sesame – to make a meal out of “Chinese Chicken” Salad and Silky Ginger Carrot Soup, but you can really stuff them with whatever you want. I have been known to use any extra dough for tomorrow morning’s cinnamon sticky buns…Mmmm…
Sesame Scallion Buns (about 12 large)
- 1 1/3 cup warm water
- 2 t. honey
- 2 t yeast (1 packet or fresh cube)
- 4 cups flour (up to 2 cups white whole wheat, or 1 cup whole wheat)
- 1 t. salt
- 1/2 bunch scallions, sliced thinly
- 1/4 cup sesame seeds
- 2 t. sesame oil
- more sesame for sprinkling (black is nice!)
- flaky salt for sprinkling
Dissolve yeast in warm water and honey – proof for 5 minutes. Add flour with salt slowly, beating well with a wooden spoon to activate gluten at around 3 cups. Knead dough 3-4 minutes, adding a small amount of flour if necessary. Let rest a few minutes and then knead for 5 – 10 minutes, until dough is smooth and elastic, (about 10 – 15 minutes total knead and rest time).
Let proof in a lightly covered, oiled bowl for 1 – 2 hours, until doubled in sized. On a board scattered lightly with sesame seeds, pat dough out into large rectangle about 1 inch thick. Toss sliced scallions in sesame oil with a pinch of salt and scatter evenly over top of dough. Sprinkle with 1/4 cup sesame seeds. Roll dough up into a tight jellyroll, lengthwise. Slice gently with a lightly oiled, serrated bread knife and place 2″ apart on a well oiled, or parchment-lined sheetpan. Sprinkle tops with a little flaky salt and black sesame. Let rise in a warm spot for 1 – 2 hours, until doubled in size.
Bake in a pre-heated 350° oven until fragrant and golden brown on top – about 15 – 20 minutes. Serve warm!
Purple Avocados and Honey, Hawaii-style

photo credit: Kevin Smith
Nostalgia Alert: When I was a kid, I lived with my mom in Northern California during the school year and spent the holidays and summers with my dad. It was a good deal, especially since my dad worked as an art professor for the University of Hawaii, so many of my holidays and summers were spent on the islands of Oahu and Kauai. On Kauai, there is an amazing valley on the Northwest side, in the Na Pali Coast called Kalalau, which at the time you could only get to via an 11 mile hike or by inflatable Zodiac boat. (I think now even those are not allowed). Also it was a state park, so visitors are only given licenses to stay for a few days at a time. Luckily for us, we were good friends with both the rangers and “Captain Zodiac”, the owner of the island’s one boat company, so we were able to boat in and live at the ranger’s camp for weeks at a time. Kalalau Valley is mythically beautiful, and you can easily get lost for hours or days at a time climbing up into the sheer Na Pali cliffs. My childhood memories include sand so soft and fluffy you sink to your knees in it, a wonderful crazy lady named Bobo who lived deep in the valley, wore no clothes, and had the most impressively scarred body I have ever seen, as well as long afternoon hikes through the sun-dappled valley, searching for elusive wild orange groves and wild avocado trees.
 Wild Hawaiian avocados are small, stringy, and bright purple, and the locals eat them as a fruit, with honey. I can’t tell you how delightful an avocado can be when you go beyond the guacamole typecasting and consider it as the fruit that it really is! Also in Hawaii you can get tubs of naturally crystallized honey which has a thick beeswax foam on the top. It tastes much less sweet than liquid honey and can be spread like butter on bread. The closest I can find in the states is something called Really Raw honey and it is delicious. Here is my favorite breakfast…
Avocado on Toast, with Creamed Honey – for 2
- 4 small slices high quality whole grain bread (walnut is awesome)
- 2 – 4 teaspoons high quality raw honey, local if you can get it
- 1 perfectly ripe avocado
- pinch of Himalayan, Celtic grey or other high mineral natural salt
 Toast the bread slices and spread each with 1 – 2 teaspoons of honey. I like it light.
Cut avocados in half, remove seed, score the flesh and scoop out 1/4 avocado per toast slice. Spread evenly and give a wee sprinkle of salt.
Enjoy!
