Home Cured Olives – Sonoma County Style…
Well… let’s just say it’s been a long time, but I have been keeping busy.
October is when the olive harvest begins in Suryalila and it is one of my favorite times of year to be there. And so when this October rolled around and I was far away from Spain, I thought I’d better see what California has to offer…
As some of you know, I have been making a slow transition this year from New York City back to Northern California, which is where I grew up. I really never intended to move back, but my father is losing his eyesight to macular degeneration, so I have been bouncing back and forth all year between my dad and his lovely 3 acre property in Northern Sonoma County, and my boyfriend Hannes in our home in Harlem, NY. To say this is a culture shock would not do it justice, but actually, I am getting used to it and am now enjoying the radical change of pace, in both directions.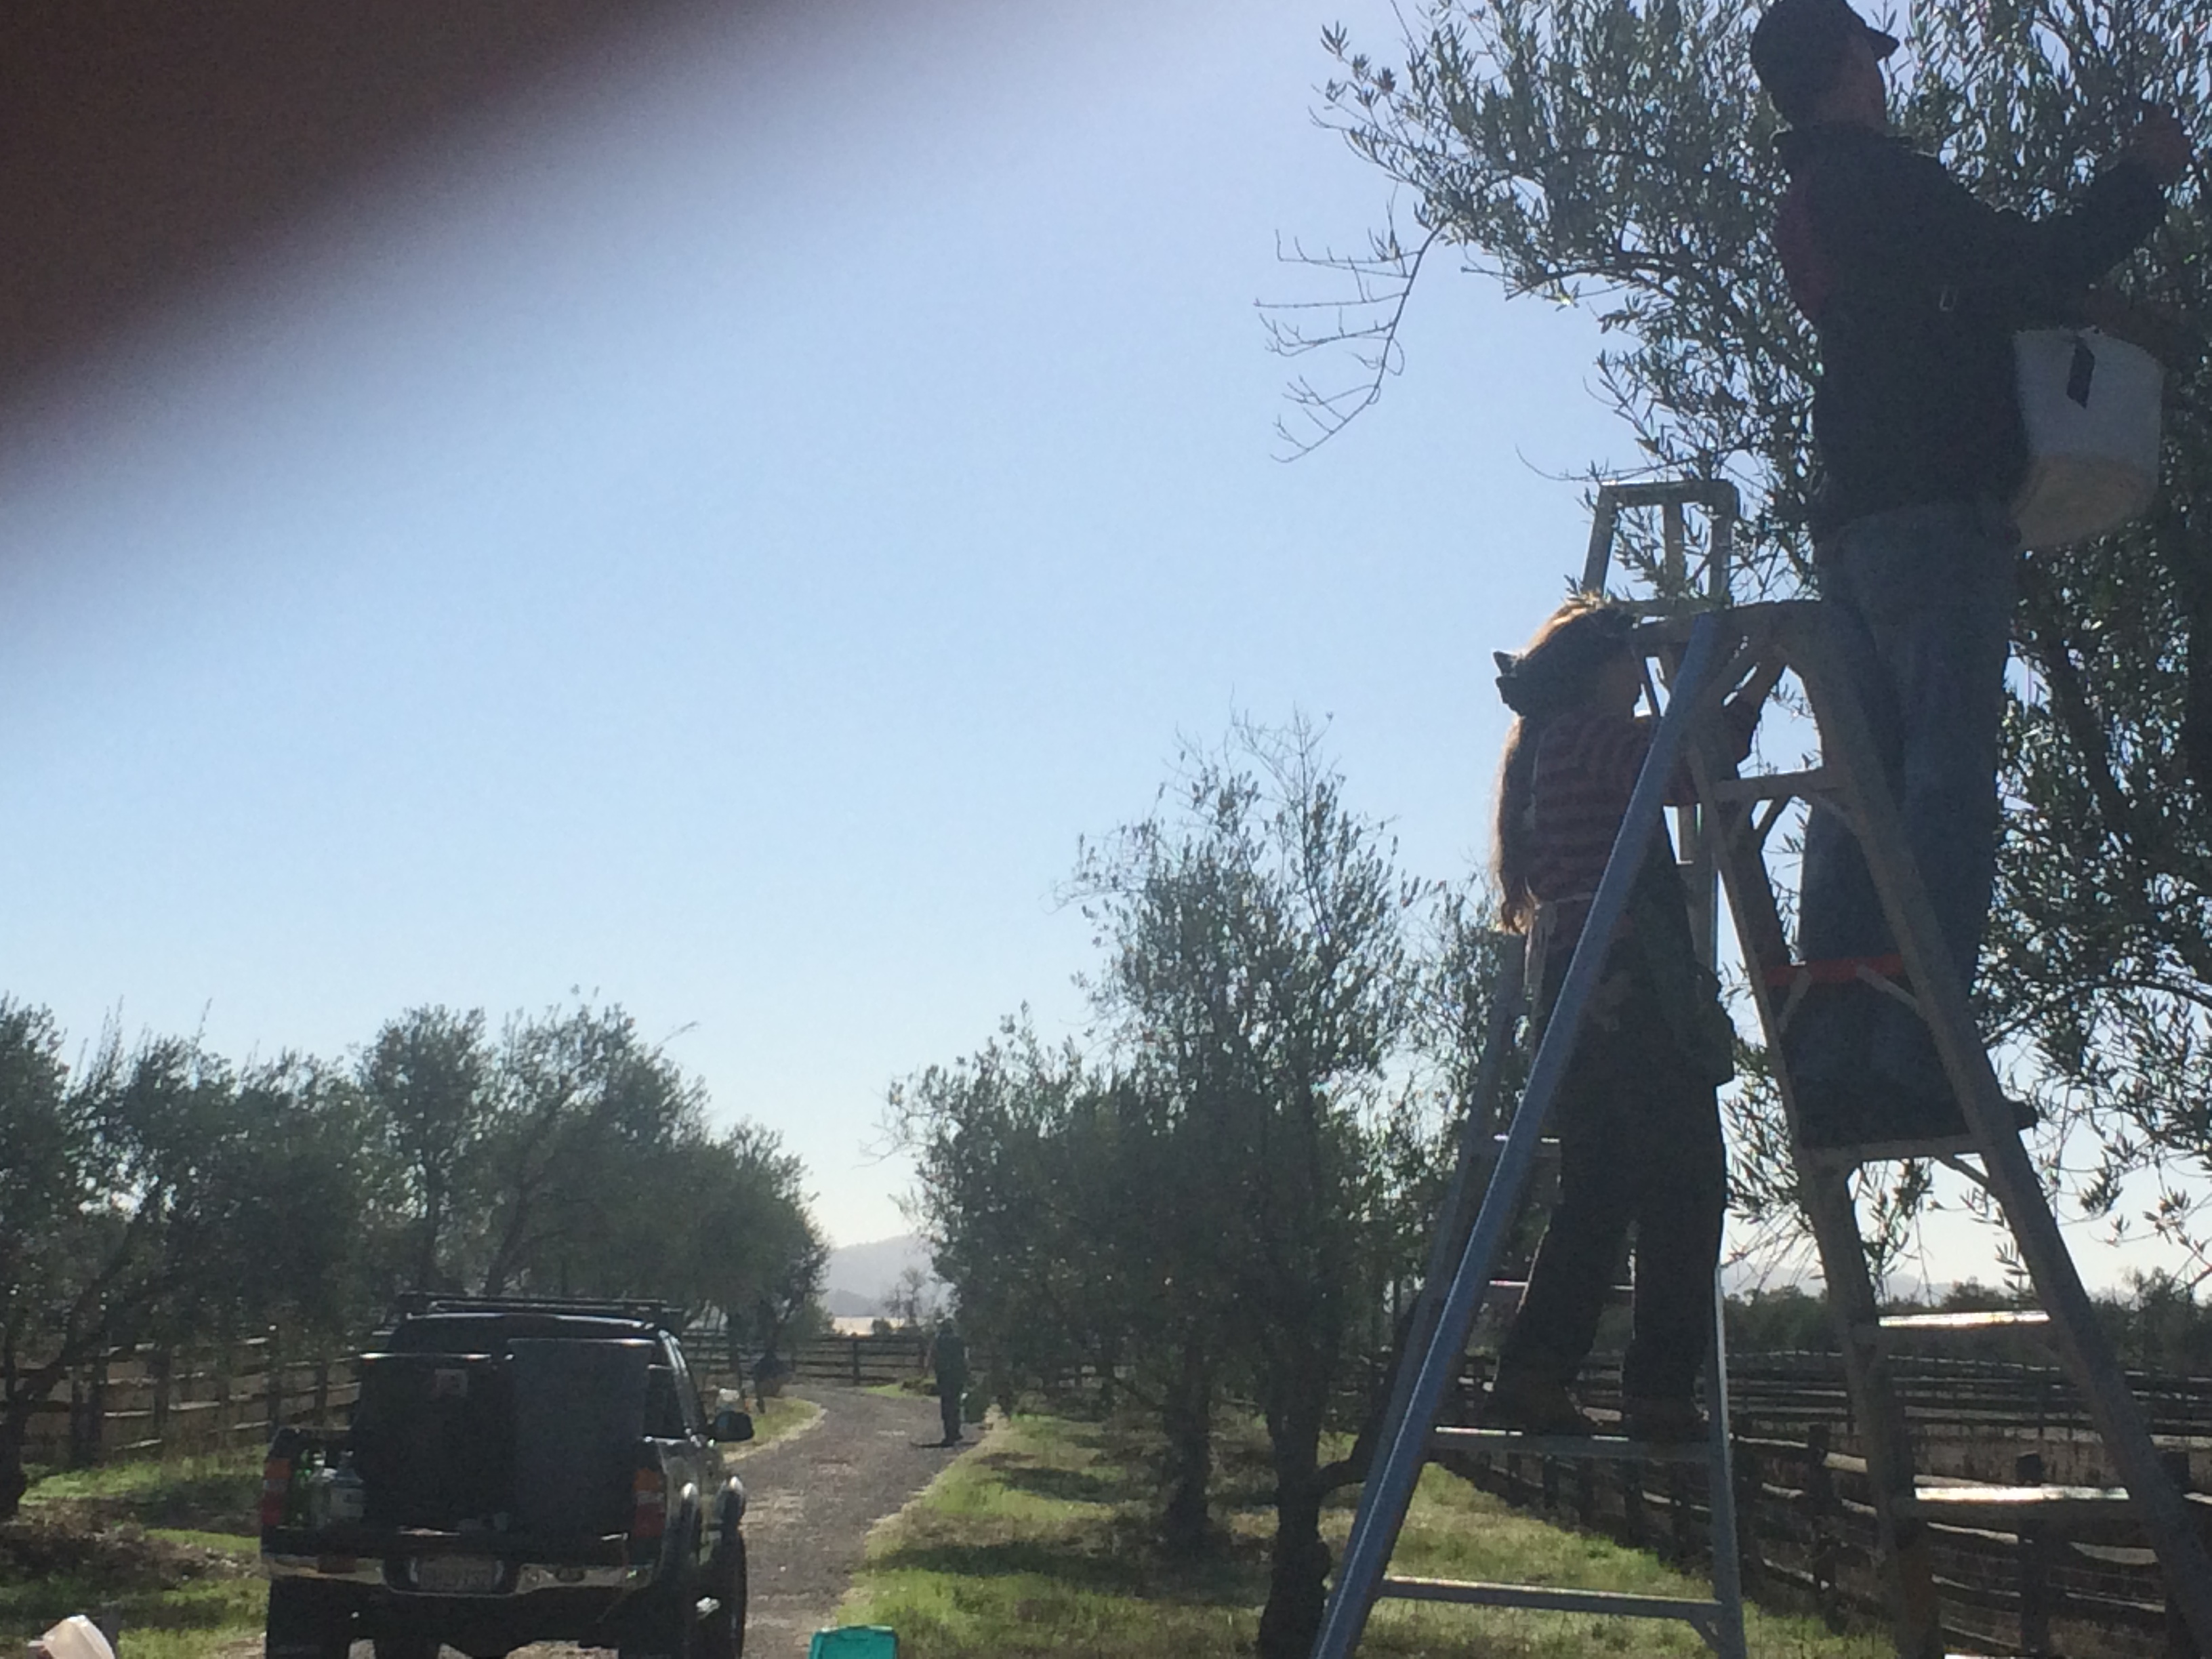
Needless to say, Sonoma County is an exceptionally beautiful place to live, and I am beginning to develop a real appreciation for the year-round farmer’s markets and the endless opportunities to grow, forage, brew, and preserve the bounties of the county. My father’s property is flanked by wineries on both sides; the road we live on was once called Oat Valley Road, and the next town West of us is called Hopland, so clearly, brewing and fermenting are in the air here. When you drive through Hopland, you see hops growing along side the road, and driving along Highway 101 in the Fall, the air is thick with the smell of must from fermenting grapes… it’s intoxicating!


And… what is lining all these the vineyards? Olive trees!
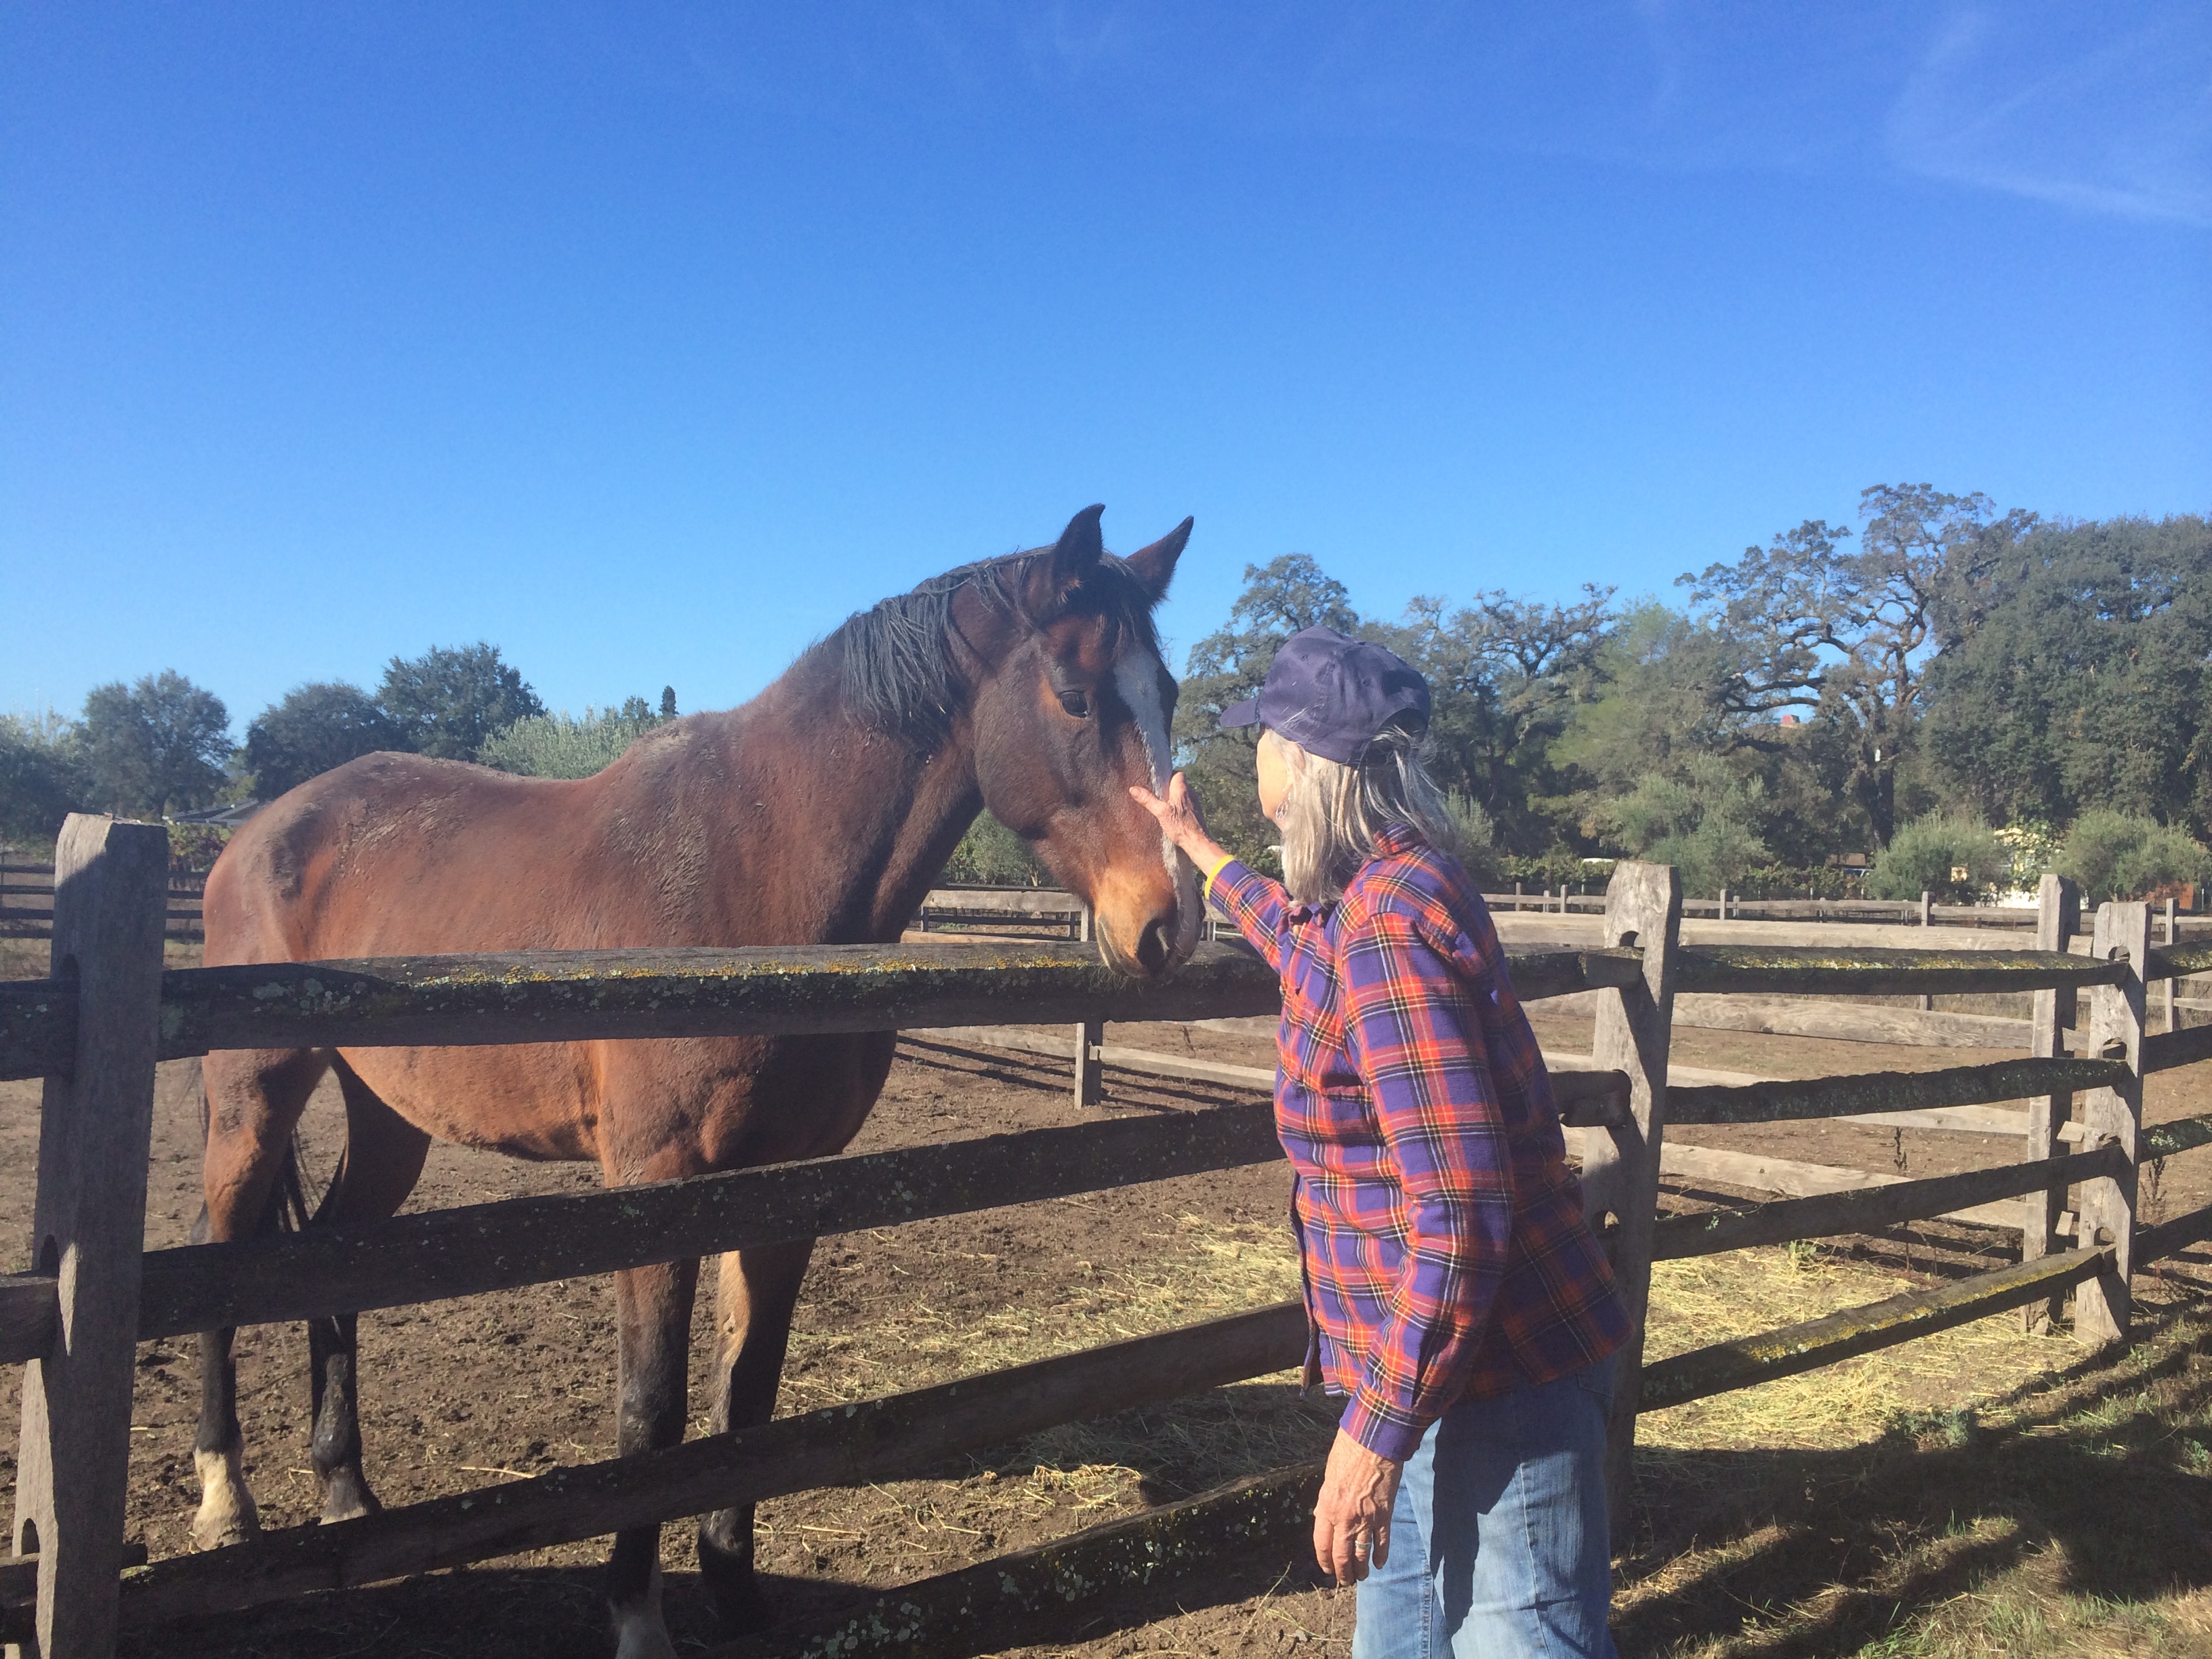
So about a month ago, I got myself invited to an olive picking party at a neighbor’s magnificent horse ranch, and our small crew of 14 spent most of a day picking 750 pounds of manzanilla olives for cold pressed olive oil. It was seriously fun, hard work. And guess how much olive oil that amount of olives will yield? …. only 13 gallons! I will never grumble about the price of good olive oil again.
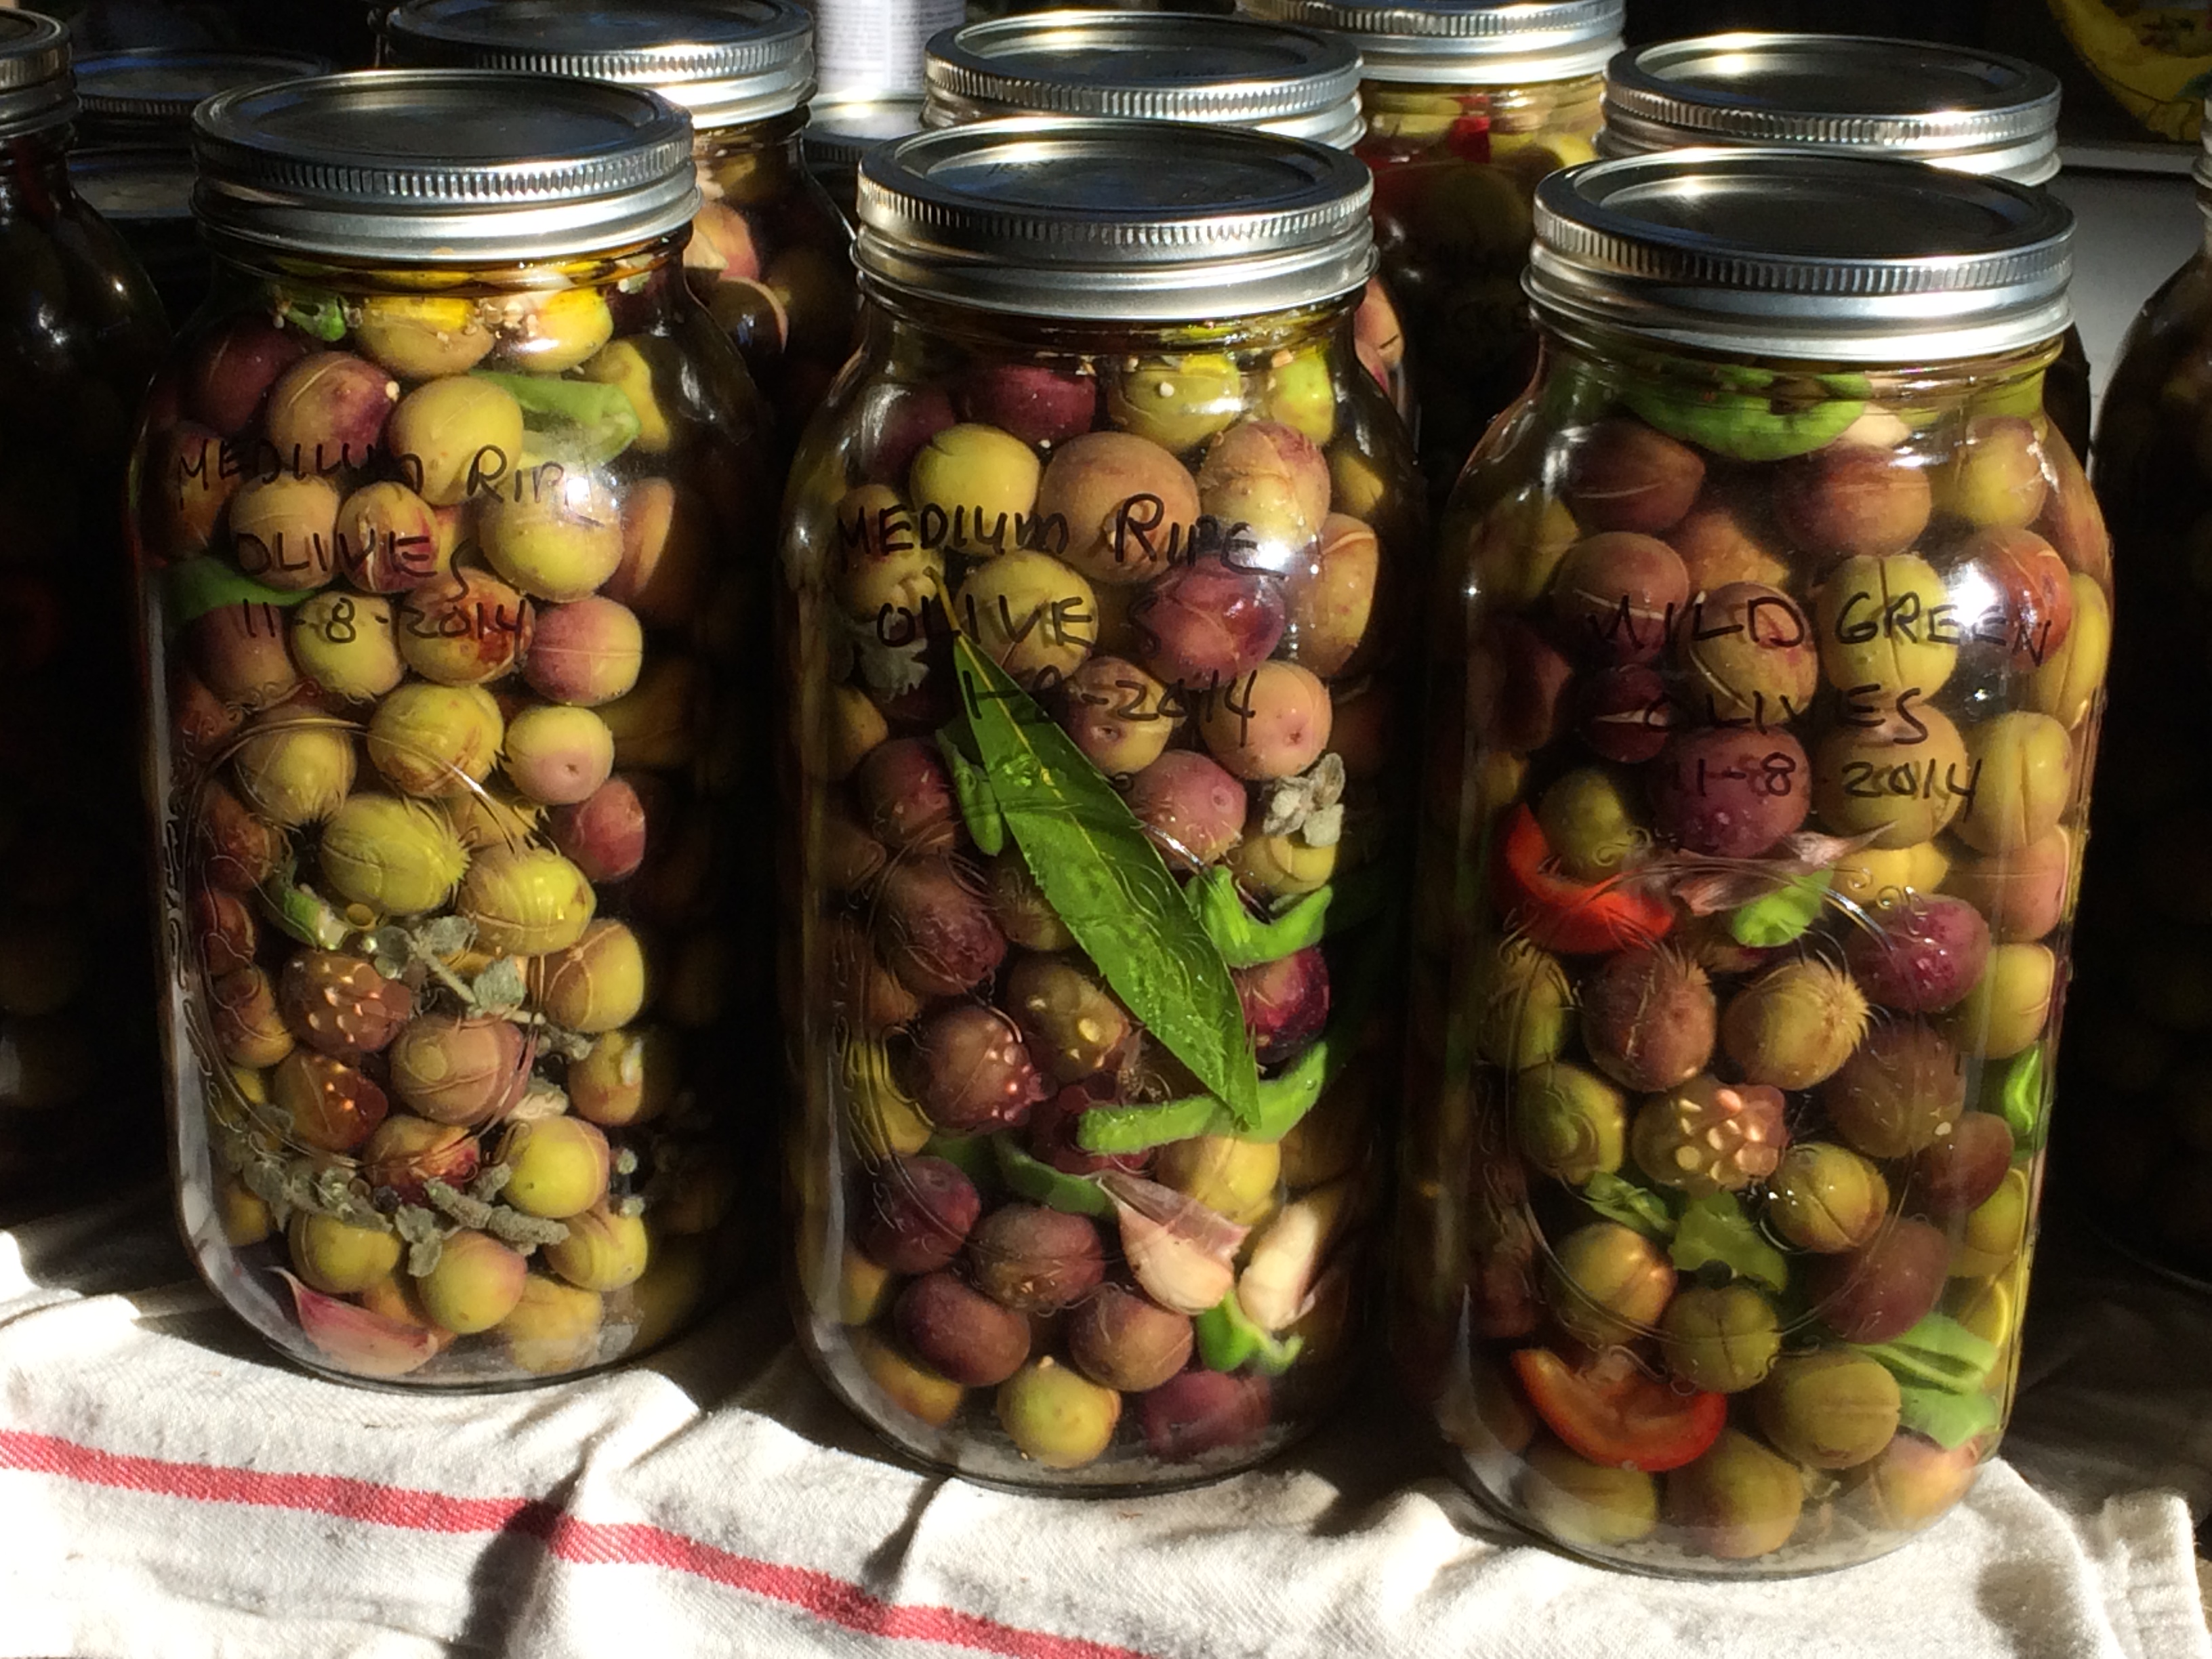
Later that week I went back and hand-picked another 7 gallons of the green and medium ripe olives from the remaining trees. I looked for the greener olives for eating. I couldn’t wait to cure them!
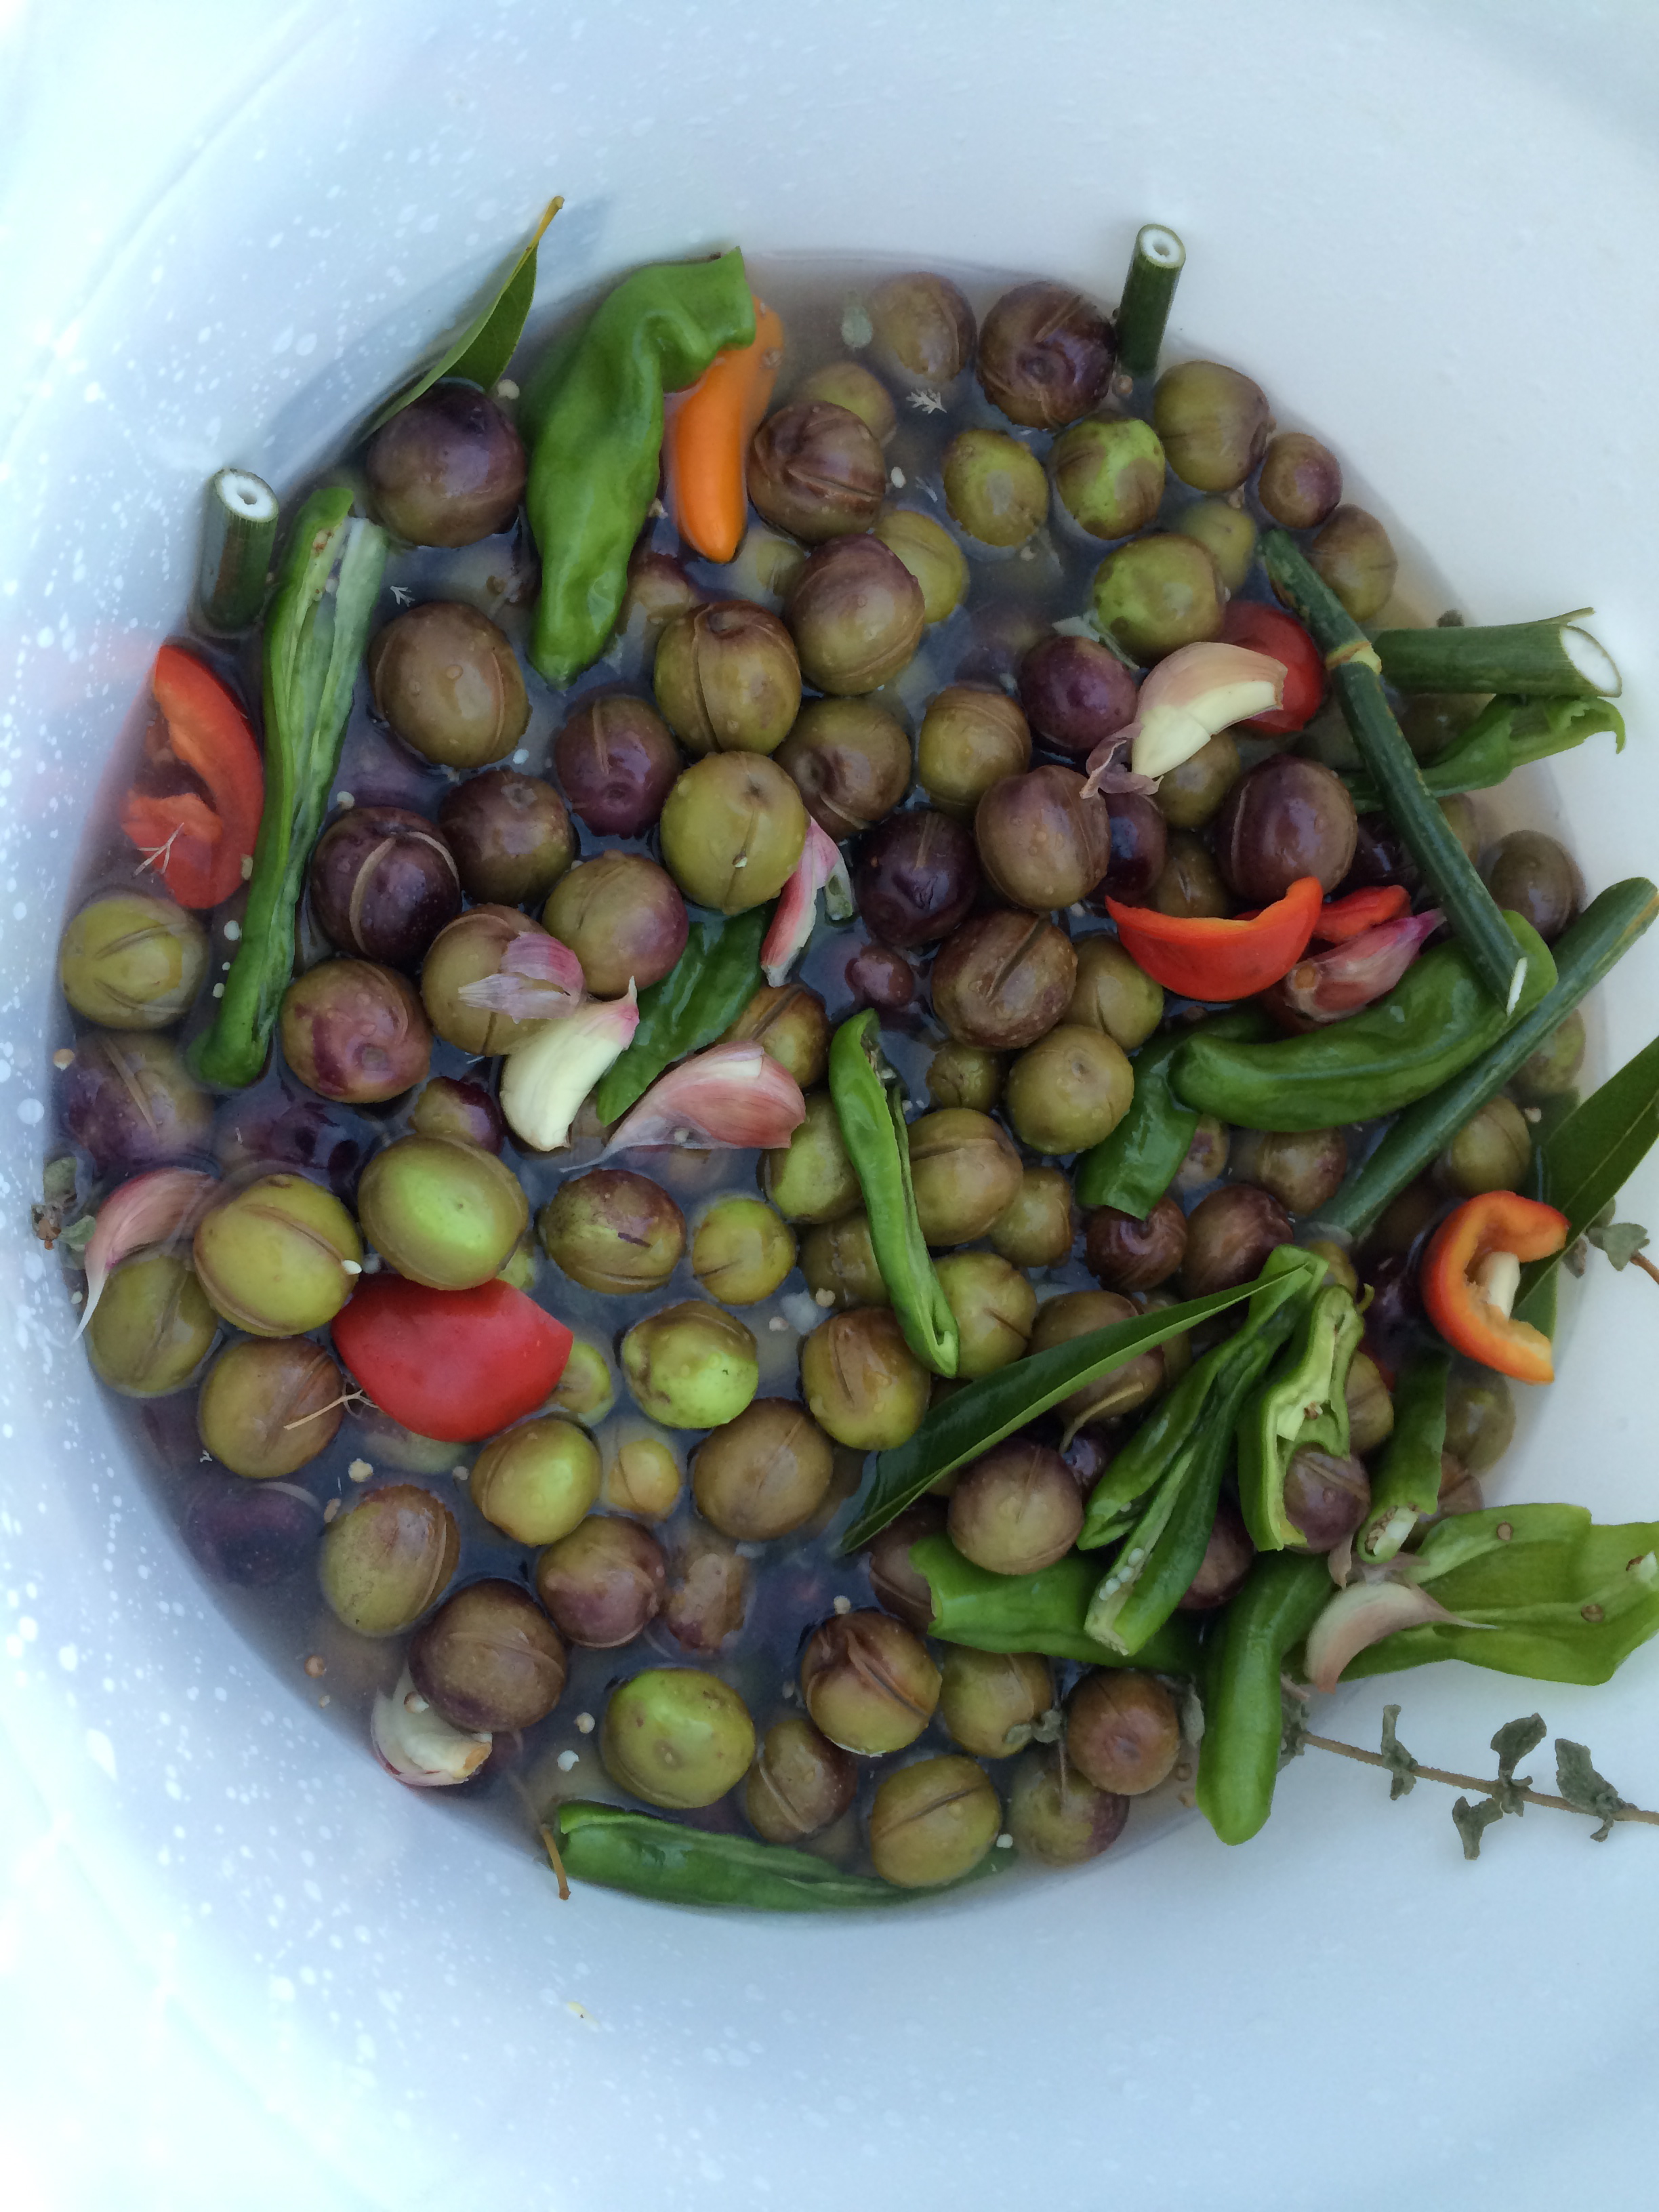
The olive curing process that I know is a water-cured process which I learned in Suryalila a few years ago from our neighbor there, Jose. What the Andalusians do is to crack or score each olive by hand, then soak for 7 to 10 days in water to remove the bitterness, and finally brine them in salt water infused with garlic, peppers and the herbs which grow wild in the area. I thought I would do the same, using locally grown and harvested Sonoma County ingredients, which included wild fennel foraged from the side of the road, California bay laurel leaves, marjoram and wild cilantro from my dad’s yard, and bright peppers and fresh garlic from the Cloverdale Farmer’s Market. Bounty of the County indeed!
Home Cured Olives – 7.5 Gallon Yield
- 7 gallons fresh green and medium ripe olives
- 3 gallons water
- 2# celtic grey sea salt
- 1/4 c whole peppercorns, lightly cracked
- 3 cups unpeeled garlic cloves
- 2# fresh red and green peppers, sliced
- 3 T whole coriander seeds
- 10 -15 fresh marjoram sprigs
- 10 – 20 fresh bay leaves
- 16 stalks fresh fennel, in 4-5″ pieces
- 36 oz white wine vinegar
- 750 ml olive oil (to pour over tops of olives)
Sort the Olives:

Sort olives, seperating the very greenest ones to be cracked, the medium to be scored with a knive, and the very ripest ones to be kept whole and salt cured.
- Cracked Green: With a mallet, gently crack each green olive on one side, just so it splits open. Try not to smash it too much here – you are are just looking to crack it open.
- Medium Ripe: With a sharp paring knive, score each medium-ripe olive in 3 or 4 places, so that the brine will penetrate down to the pit. Again, try to do without squashing or bruising the olives too much.
- Dark Black: The very dark, ripe olives I kept whole and covered in course salt and stored away in a cardboard box in a dark closet to “sun dry” them, ironically. This is a first time for me with this process so more later as I figure out what I am doing here…
Soak the Olives:
Using at least three 5 gallon buckets, cover the olives completely in cold filtered water and float a plate with a small weight on top to keep the top layer of olives submerged. Let soak in a cool dark place for a week to 10 days, draining and changing the water at least once a day. This helps to remove some of the bitterness of the olives, and the salt brining will complete the process. You will see that the cracked green olives, which have more surface area exposed, will de-bitter quickly, turning from bright green to a drab…well, “olive ” color. You should be able to almost eat one of these without grimmacing and 7 -10 days should do the trick.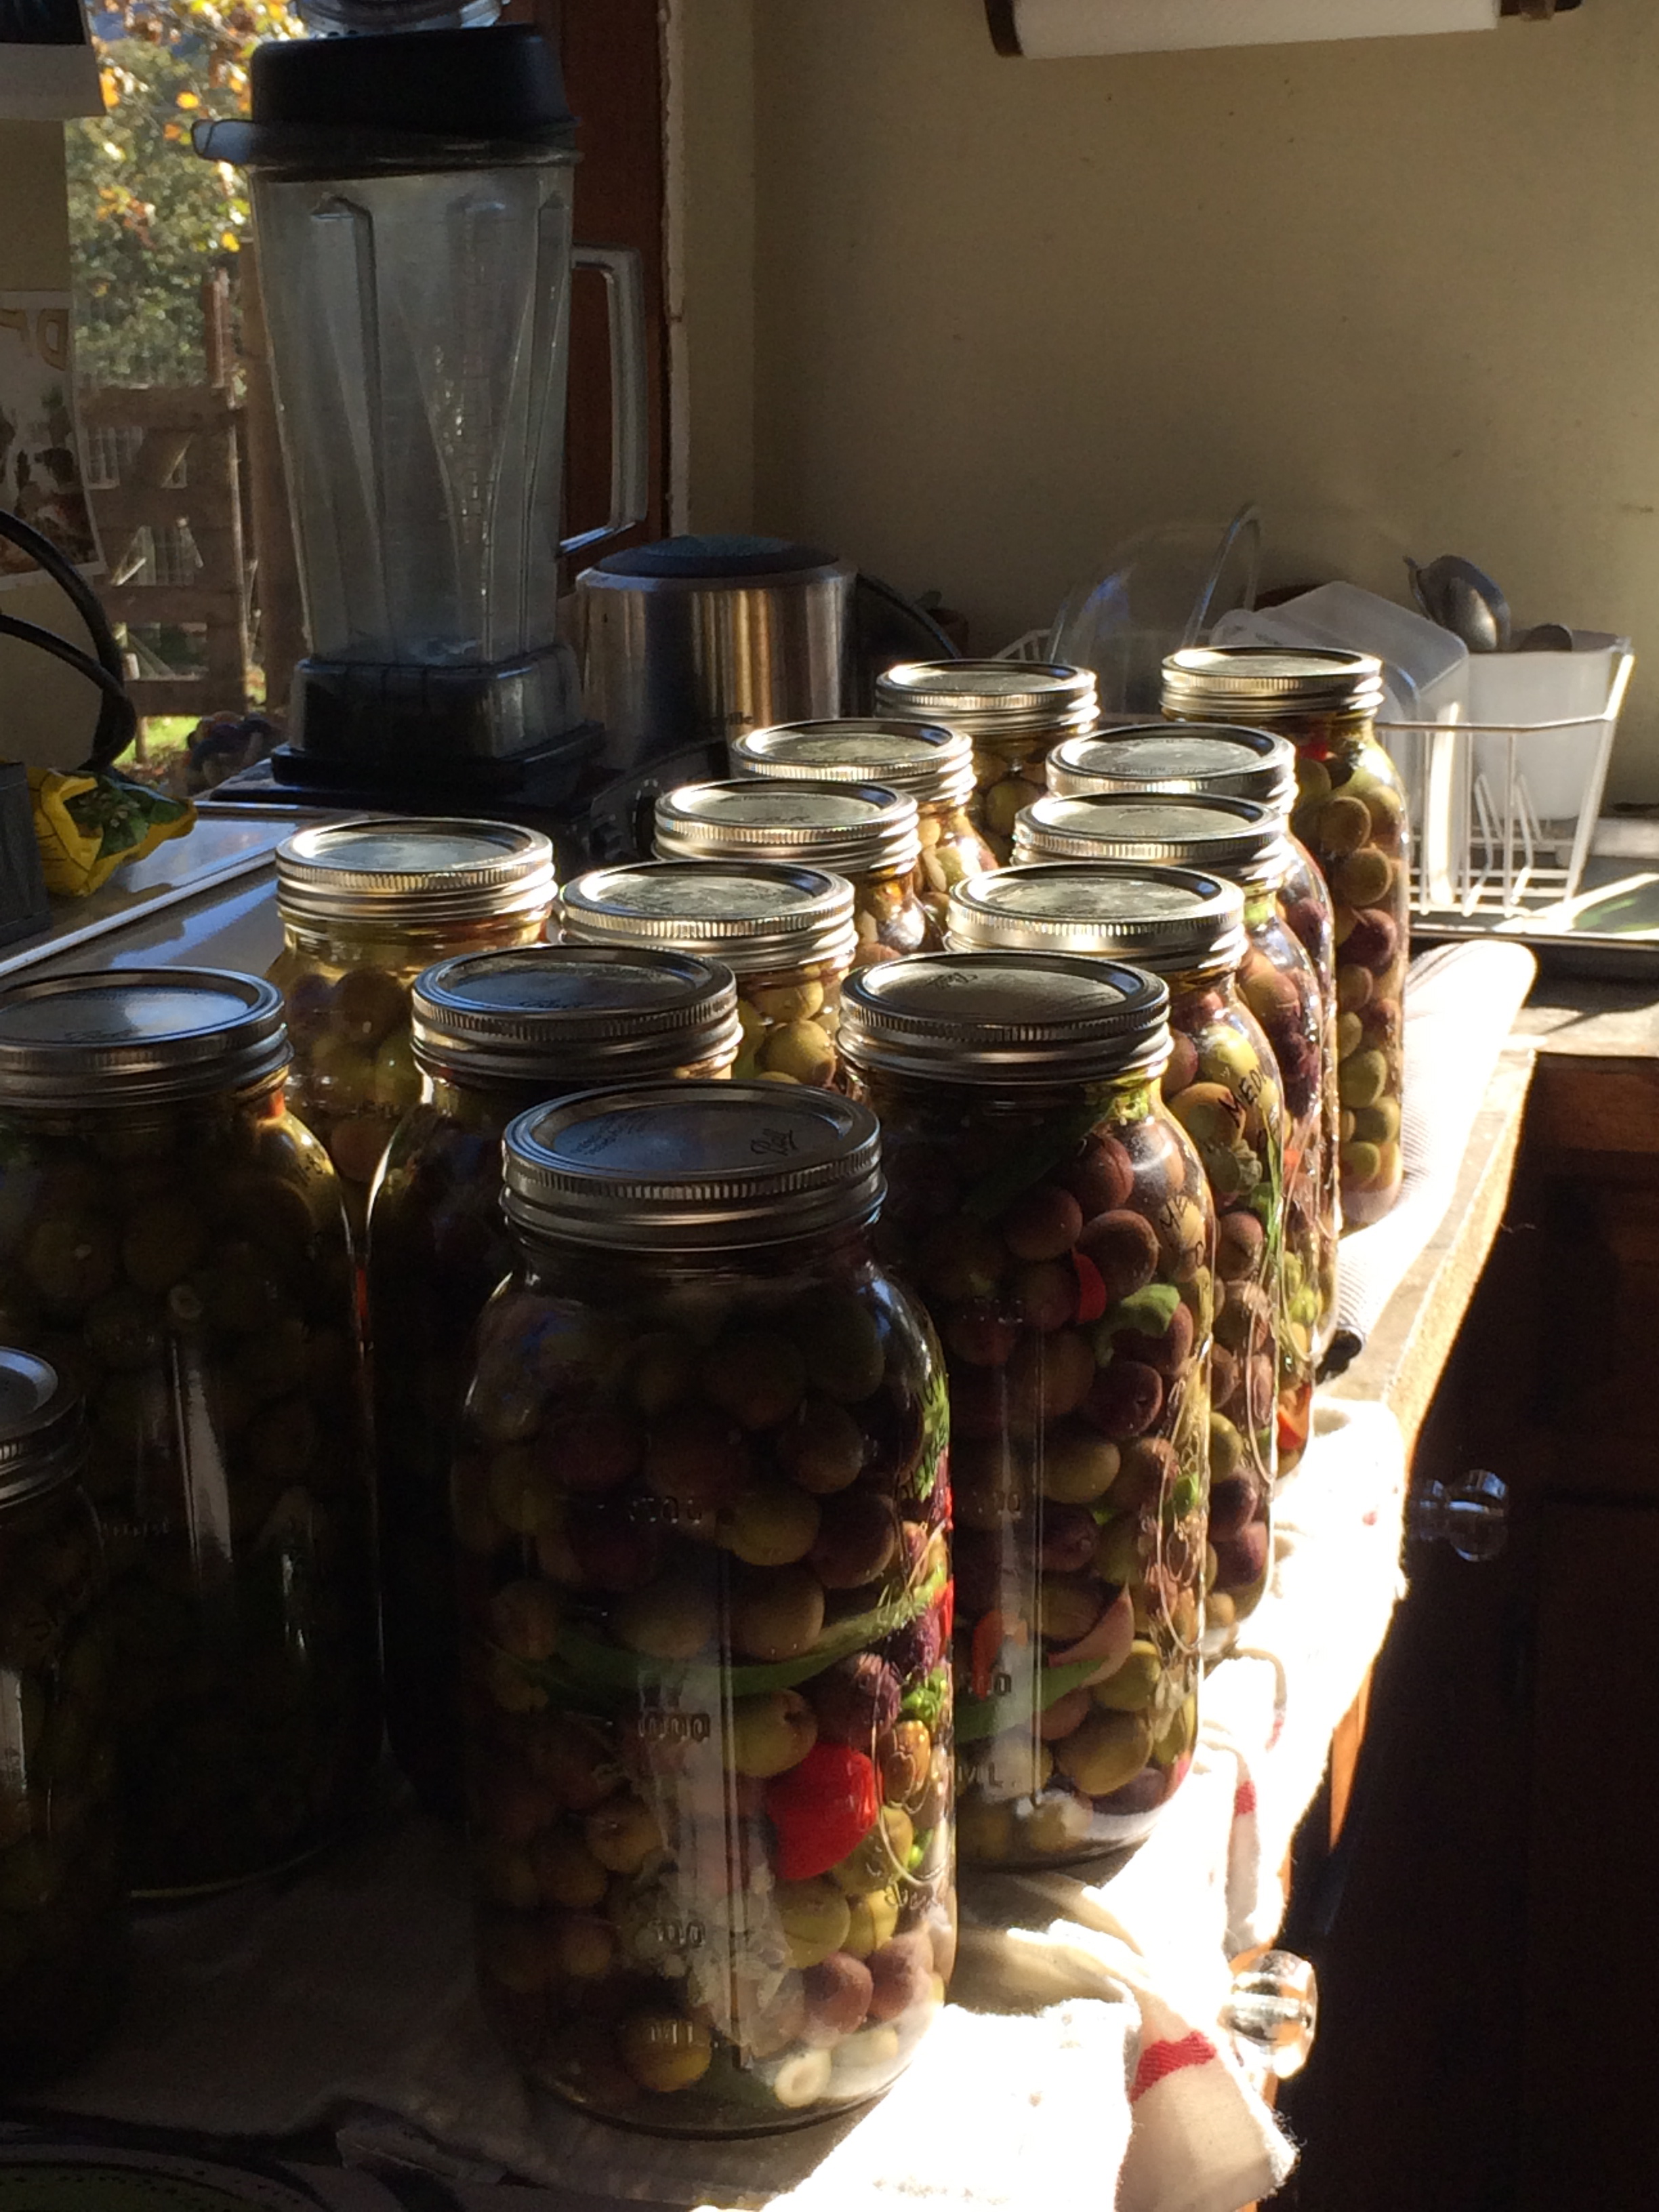
The less ripe end of the scored olives might take a few days longer – you will see them also change color. I pulled all of this batch after 7 days because of my own time restrictuions (I needed to get to NYC: Sometimes the slow food movement clashes with my jet-set lifestyle…) This will just mean a longer cure in the salt brine… it can take sometimse up to a couple of months for the bitterness to leave the olives this way.
If you soak the olives in water longer – 10 days to 2 weeks even – you can reduce the brine curing time (and the entire curing time) to only a few weeks. These olives will tend to be less bitter, but sometimes a bit softer than olives cured using the longer brining method.
Make the Brine:
A day before your olives are ready to escape their water bath, heat one gallon of water, add salt, and stir to disolve. Add remaining two gallons of cold filtered water. With your mallet, lighly crack the garlic cloves, and let sit out for at least 10 minutes to oxidize**, and then drop with peppers, herbs and spices into your bucket. In Spain, Jose lightly muddled the peppers with the garlic and herbs with a large mortar and pestle before adding to the salt brine, but I decided not to do this on this round. Too messy!
 Add 2/3 of the white vinegar and taste. I make half the olives at this dilution, and then add the remaining vinegar to the other half of the batch, making some of the olives a bit more vinegary. (Alternately, you can leave the vinegar out. Tradicionally the Andalucian olives are made only with salt).
Gently fill 15 half gallon mason jars with olives, nearly to the top. Pour brine evenly over olives, leaving 1/4 to 1/2 inch below the lip. Tap lightly on the counter to release bubbles, then top with olive oil to the rim. Carefully screw the jar lids on, leaving as little air in as possible.
Store olives in cool dark place, or (ideally) refrigerate. They are ready when they have lost their bitterness, and this can take from 3 weeks to 3 months, depending on the variety and ripeness of your olives, the length of your soak time, etc. You can try the cracked green olives in 3 weeks, but the scored olive will likely take a month or two to finish. To taste, fish out an olive or two, and then top off the jar with a splash more olive oil, keeping the olive submerged under the oil and as air-free as possible.
Buen Provencho!
* Using Celtic Grey Salt: I know… it’s crazy to spend $4 a pound on salt right? Wrong. Suck it up and spend the money on high quality, high mineral salt whenever you can. Using good salt to naturally preserve and cure olives is a no-brainer and makes them even more special… I consider them medicinal!
** Releasing Allicin: When crushed, raw garlic produces a powerful antibacterial, antifungal and antiviral sulphuric (stinky) compound called allicin. Within 5 minutes of being crushed and exposed to air, garlic explodes into a variety of sulfur-containing compounds which are supposed to be very good for the heart, lowering blood pressure and releasing more oxygen to the blood stream (always a good thing!). Studies have also shown that raw garlic a powerful anticarcinogenic, internally halting the growth of cancerous tumours in the body.
***What’s in an Olive?
Raw cured olives are chock full of healthy, monounsaturated fat and loaded with antioxidant and anti-inflammatory nutrients. Green olives are higher in oleic acid, which has been shown to decrease blood pressure, while black olives contain more iron and vitamin E. Both also contain serotonin, the hormone which triggers your body to feel satisfied… how good is that? Eat your olives!
Suryalila Vegetarian Paella
 Hola from the Suryalila Retreat Centre Kitchen! We are now officially up and running and we have just brought in Eduardo, an excellent new chef who will be running the kitchen while I am away. (I am planning to head back to the States next week to apply for my Spanish visa). It is sad to leave now – just when the retreat center kitchen is happily humming along, and the garden in starting to really take off, and we have all started to find our groove here running a brand new yoga retreat centre… but I also am looking forward to being home and enjoying Spring in NYC with Hannes.
In Suryalila, we have been gearing up for our first 3-week long yoga teachers training intensive with almost 30 people, which will start on Sunday. Everything has gone incredibly well here since we opened our doors last month – we have had 3 smaller yoga retreats and a steady stream of regular guests, which has given me exactly 3 Sundays to perfect my Vegetarian Paella technique!
I am so much better at doing things than explaining them… so I am sorry but this recipe is going to sound really complicated. It really is not difficult, but there are a lot of elements to it, so I guess it goes into the “Labors of Love” recipes category… which I just made. (This was previously called the “Dedicate Your Saturday” category, so now the gnocchi recipes have company on the weekends.) Also, as with every recipe, obviously you should feel free to adapt to what is in season, what you have on hand, etc. In Southern Spain right now, the fava beans are just coming out, oyster mushrooms and artichokes are plentiful, and wild asparagus is growing in the fields and beside the roads everywhere…
Vale…vámanos!
Suryalila Vegetarian Paella for 10
 Prepare all ingredients and set aside…
- 3 cups Bomba rice (similar to arborio rice, and traditionally used for Paella)
- 6 cups good vegetable stock, warmed with
- 1/2 teaspoon crushed saffron
- 1 cup fresh fava beans, peeled, lightly poached in salted water or broth until their skins split.
- 1/2 bunch asparagus, trimmed into 5 -6 inch lengths, and lightly coated in olive oil and salt
- 2 fire-roasted red peppers, one cut into long decorative strips, and 1 diced finely
- 8 -10 wedges of marinated artichoke hearts
 Marinate the Tofu (optional)…
- 1 pound of tofu, cut into 1/2 inch pieces
- 2 T olive oil
- 1/2 t oregano
- 1/2 t black pepper
- 1/2 t salt
- 3 T smoked paprika (or sweet)
Fry tofu in olive oil until slightly brown on some sides, add all seasonings and toast on low heat for a minute or two. Let marinade for up to a day at room temperature if possible.
 Sauté the Oyster Mushrooms…
- 1 pound oyster mushrooms, torn into pieces
- 2 T olive oil
- 1/2 t crushed garlic
- 1/2 t salt and pepper
Sauté oyster mushrooms slowly in a non-stick pan with olive oil, salt, pepper and garlic until browned and flavorful on all sides. If not using tofu, add paprika and oregano to mushrooms instead of tofu.
Make a Kick-Ass Sofrito…
- 1 cup onions, diced
- 2 T olive oil
- 1/2 cup green peppers, diced
- 1 T garlic, crushed
- 1/2 cup roasted red peppers, diced
- 1/4 cup parsley, chopped
- 2 cups cubed or crushed tomatoes, bottled or fresh
- 1 t salt
- 1/2 t pepper

In one medium-sized paella pan or large skillet, saute onions with olive oil and salt until soft. Add garlic, green peppers, finely diced roasted red pepper and saute for 5 or more minutes until soft and onions start to brown. Add chopped parsley and tomatoes to middle of pan and cook n medium flame for another 5 minutes or until the tomatoes start to caramelize slightly.
Add dry bomba rice and stir into sofrito until rice is thoroughly hot and just starting to stick to bottom of pan, (about 2 minutes).
Add hot saffron broth slowly to paella pan, allowing the broth to completely cover the rice. Add mushrooms and tofu and push them gently into rice and broth, without stirring. Shake pan to even out rice level and make sure the liquid just covers everything, adding more if necessary.
Cover paella pan with foil and allow to cook over a medium flame for about 10 minutes. Remove foil and arrange red pepper strips, artichoke hearts, and asparagus spears decoratively on top of rice. Sprinkle fava beans over top, cover again with foil and simmer slowly for another 10 minutes*, or until water is completely absorbed and rice is cooked al dente. Don’t be afraid to add a bit more broth if your paella is starting to get crispy on the bottom but is still not cooked on the top or sides.
* If your paella pan is much larger than your burner, place it on 2 lit burners for the last 10 minutes, and rotate every minute, so the sides of the pan also get cooked.
Stick a fork into the middle of the pan and try the rice to test if it’s done. The bottom should be sticking to the pan a little, and the top should be al dente, but not actually crunchy.
Take off heat, remove foil, and serve with lemon wedges. Buon Provencho!


Wild Nettle Gnocchi Adventures in Spain…
 “Hey – let’s walk out to the old convent to pick nettles and make stinging nettle gnocchi!” Krishana says…
How could I say no to that? Even though I have been in Spain for less than a week, and I am still living from a suitcase more or less camping out in a house strewn with unpacked furniture…and even though I only have a few weeks to get settled and get the new retreat center kitchen together, equipment purchased, people organized, supplies ordered…
 How could I say no? So we walked through the olive orchard (we have 350 trees!), over the neighboring wheat fields and to the god-only-knows-how-old crumbling ruin to which I look out upon from my bedroom window each morning. They call it The Convent. It is huge and roofless, with arched windows in the tower that look out over miles of surrounding countryside, including our property, Villamartin, Prado del Rey, and Arcos de la Frontera, a few the famous Andalusian white villages.
Inside, the entire ruin is completely full of waste-deep dark green stinging nettles! Armed with (almost-thick-enough) gloves, we harvest the lovely, giant, tender nettle leaves from the one shady corner, carefully picking just the leaves. Nettle flowers contain an irritant to the urinary tract, but the leaves and stems are surprisingly rich in protein (up to 25% dry weight) and full of iron, potassium, manganese, calcium, as well as vitamins A and C. Steamed, they are very tasty… like a soft, rich, extra-green tasting spinach.
 Krishana, who I come to understand is a bit of a celebrity gardener on Martha’s Vineyard, has taken it upon herself to create a giant organic vegetable garden for the Suryalila Retreat Center kitchen. In the two months since I was last here, has miraculously transformed about an acre of what looked to be hopelessly barren, rocky, dry soil into rows and rows of sprouting, peeking, microgreen potential! I mean, we are talking about rows of tatsoi, mizuna, spicy braising mixes, 3 or 4 types of kale, chioggia and bull’s blood beets… (wait – is that even vegetarian?). We are planting huge amounts of crazy gourmet vegetables, flowers, and herbs- some of which I have never worked with so I can’t wait until they all come up!
I have to say that Krishana is also the kind of person who is super fun, and who will always be getting you into trouble. I have known her for two days and already I know this – yesterday we were chased around by the local supermarket police, got almost lost several times trying to find our way back from town, and arrived back and the kitchen at 7pm which is when I should have had dinner finished. And now we are climbing through barbed wire fences to get to the elusive nettle patch when we are probably both supposed to be doing something more responsible… how great is that!
 So yes, I am finally here in Andalusia Spain! I will be here for 6 months to a year to start, setting up the Suryalila kitchen, cooking, blogging and, I suspect, soon embarking on a crash course in organic gardening. The property already has loads of fruit trees (lemons, tangerines, figs, cherry, peaches, apricots, quince and the Sevilla oranges) not to mention loads of olive trees and some almond trees, which are just starting to blossom. And now Krishana has planted almost an acre of organic vegetables which should take care of most of our veggie needs for most of the year. If not… well, there just happens to be an organic farming collective just 15 minutes away. Folks, we are going to eat well this year, so if you have ever harbored any fantasies about roaming the Andalusian countryside, picking oranges and almonds off the trees, drinking good (cheap!) Spanish wine, maybe doing a little yoga or horseback riding…all while enjoying amazingly fresh local organic gourmet cuisine… you might think about coming for a visit to Suryalila while I am here.
So, in celebration of our almost 1/4 acre of newly planted potatoes and to continue the gnocchi theme, here is recipe for potato gnocchi – the all day, even-though-it’s-not-Saturday type. We started with over 5 kg of potatoes, and after feeding a very enthusiastic crowd of 10, I have enough frozen for at least one more meal, maybe two. This recipe I adapted from Michael Chiarello’s potato gnocchi recipe, because it seemed to have a higher ratio of eggs than most. Did I mention that the fruit orchard is also a huge chicken yard, housing nearly 100 birds – chicken, geese, turkeys, and peacocks? We are now bringing about two dozen eggs a day, and because I don’t use a lot of eggs or dairy in my cooking, they are starting to pile up. (My new challenge this year with be in managing abundance!)
 So here is a great potato gnocchi recipe, to which I added the bounty of our our wild nettle harvest, with the result being the most lovely plump little green flecked dumplings you could ever imagine. Delicious and totally worth the work!
Wild Nettle Gnocchi for about 24
- 10 pounds potatoes
- 2 -3 cups coarse or kosher salt (not a typo)
- 15 egg yolks
- 5 cups all purpose flour
- 4 cups fresh nettle leaves, without stems or seeds
- Freshly ground pepper
Preheat oven to 425°
Blanch the nettles in about an inch of generously salted water. Drain, cool, squeeze dry and chop coarsely.
 Wash and bake the potatoes on a layer of course salt for 45 minutes or so until very tender, then peel the potatoes while still hot, being careful not to get too much salt into the whites. You can save the salt to use in the next batch. Press the potatoes through a mill or grate, (or mash by hand if you are ok with something a bit more rustic and lumpy – this is what I did and it was great). Taste for salt and add some if they don’t taste like… well, mashed potatoes. I found that after the salt baking and messy peeling process I did not need to add any more salt, but you are probably a neater cook than I am.
If the potatoes are still screaming hot, spread out to cool a bit so the yolks don’t cook, then, using a fork, gently work the eggs yolks into the warm but not hot potatoes, cutting them in and keeping it all as fluffy as you can. Dump a couple cups of flour on a worktable, top with your potato mixture and gently work in most of the flour, using your knuckles and hands to gently work and fold it in, (without really kneading it though). Scatter the chopped nettles over the dough and gently fold in a few times to partially integrate, leaving it a bit flecky. It’s nice to have bits of green here and there.
You may not need all the flour here, and you may need a bit more, but go for less if possible. This part is really “by feel” and its a great feeling so enjoy it! You should have something that is just barely a dough, and that you can roll into ropes as long as it is very well covered in flour. Split the dough into 4 pieces, and pat each piece into a 1 inch think rectangle. Slice 1 inch pieces off and roll them between your palms into 1/2 inch ropes, then cut again into 1 inch logs. You can leave these as little dumplings, or roll them off a fork, Italian Granny style…
Keep in a single layer on a well floured sheet-pan until ready to cook or freeze. If you are freezing, just put the whole pan in the freezer and bag up the gnocchi when frozen solid.
Cook gnocchi in small batches in boiling salted water for 1 -2 minutes after they bob to the surface of the pot. Drain well and toss in a pan with very good olive oil or butter and a little Parmesan, salt, and pepper, or serve with your favorite sauce.


About halfway through the process, I realized I had someone who did not eat wheat, but luckily I had a bit of potato left over so so I whipped together a gluten free gnocchi using rice flour. It worked amazingly well! Makes me want to try with corn flour, spelt, etc…
Gluten Free Wild Nettle Gnocchi for 2
- 2 cups salt-baked, mashed potatoes (see above)
- 1 cup rice flour
- 1 large egg plus 1 yolk
- 1/4 cup cooked, squeezed and chopped nettles (see above)
- pinch of salt if necessary
Make gnocchi as show above, but don’t worry about overworking the dough… you can’t. These will be a bit more delicate to cook, so its best to keep them in a simple log or pillow shape, rather than rolling them off the fork which makes them want to fall apart. Enjoy!
Gnocchi gnocchi gnocchi gnocchi gnocchi….
 Besides being really fun to say, and sort of mind-boggling to spell, gnocchi are really super fun to make. And, apparently, you can make them with pretty much anything. This winter, after years of being intimidated by the process but drawn to the allure of these puffy little dumplings, I finally decided to tackle them and pulled out my mom’s old fashioned potato mill from the pantry….
I started with what looked most legitimate – the über fussy potato ones from Nancy Silverton’s gorgeous new Mozza Cookbook. Because I am incapable of following a recipe verbatim, (even my own), and because I wanted to try making them using white whole wheat flour instead of white all-purpose, I second-guessed the recipe and added about 1/2 cup less flour than she calls for.
They were incredibly delicious – maybe one of the the most delicious potato things I have ever put in my mouth. But they were also almost too delicate, and could have used more flour in them for a bit more bite…(probably exactly what the recipe called for). Making potato gnocchi is really a project and the Mozza recipes are great – very detailed and wonderfully specific – so rather than trying to re-post my only slightly modified version of that recipe*, I am going to recommend that you get that book, which is loaded with other inspiring veggie recipes, and devote an entire Saturday afternoon to the Potato Gnocchi Gods as I did. It’s wonderfully satisfying.
On the other end of the spectrum – for everyday life – there is ricotta gnocchi, which are so ridiculously quick and non-fussy to make that a dinner for two can be pulled together in about 30 minutes. Probably less. These are really a different creature than the potato ones, even if they look the same. Whipping these off the fork last night with the help of a somewhat ambivalent 12 year old was a whole different dimension from the Saturday mega-project, which was a dedication to art and love. The ricotta dough is definitely less silky and refined, and these gnocchi of course will not give you the Sublime Potato Experience (if you are prone to that sort of thing). Nonetheless, they are possibly even more fun to make because they can be made so easily and spontaneously, and they are unpretentious enough to really be dressed up with any funky old sauce, or none at all. They are amazingly tasty just as they are.
 Fresh Ricotta Gnocchi in Herbs – for 4
- 2 cups whole milk ricotta, (organic, grass fed if possible)
- 2 whole eggs
- 1 cup freshly grated Parmesan (use a microplane)
- 1/4 t salt
- 1/4 t white pepper
- freshly grated nutmeg
- 1 1/4 cup white whole wheat flour, plus 1/2 cup for shaping
- 3 T. butter, olive oil, or a mix
- 1 T minced fresh herbs (rosemary, sage, thyme, or a combo)
- 1 T freshly chopped Italian parsley
In a medium sized bowl, combine ricotta, eggs, 1 cup Parmesan cheese, nutmeg salt and pepper. Still to combine thoroughly. Add flour and mix lightly to combine. Dough will be very soft.
Dump out onto well floured board, turn over and fold over very gently a few times just to fully integrate dough. Separate into two balls and, taking turns, shape and flatten each one into a 1 inch thick rectangle. Using a clean knife, cut 1 inch strips from this and gently, on a well floured board, roll each one out into a 1/2 inch thick rope of dough.
Cut the rope into 1 inch “pillows” and, using your thumb on the back of a fork, gently roll each gnocchi off the fork tines, creating ridges on one side and a bit of an indentation on your thumb side. Don’t be afraid to be liberal with the flour. Or, you can just forget the fancy fork thing and do some rustic “loggy” ones or whatever you like. Try some fishes! Just make batches in relatively all the same size so that they will cook at the same time.
Repeat shaping the remaining gnocchi, dropping the finished ones on a floured baking sheet in a single layer. These can be frozen like this, to be bagged up after they freeze or cooked immediately.
 In a well seasoned or non-stick skillet, heat butter, olive oil and minced herbs gently while you cook the gnocchi. Keep on low-med heat so the herbs get a little crunchy, but do not burn.
To cook, bring a medium sized pan of salted water to a boil. (The rule for fantastic pasta of any kind is to make the water as salty as the ocean, and to use high quality grey, sea, or Himalayan salt to do this with. Trust me, it’s worth it). Cook the gnocchi in 2 – 4 batches at a time, for only about 2 – 3 minutes after they float to the surface. Alternately, you can skip the cooking and try just pan frying them, but I found them a bit lighter if you boil them first.
Drain with a slotted spoon or strainer, adding all the cooked gnocchi to your skillet before tossing quickly and giving a slight reheat in the herb-butter. Finish with a touch of coarse salt, freshly ground black pepper, and parsley, and top each serving with a bit of grated Parmesan.
*The white whole wheat flour works surprisingly well in gnocchi! Substitute 1:1 for all purpose in the recipes. It’s delicate and just slightly nutty which works great with the butter sauce, and you know…if you didn’t know, you wouldn’t know.
